Enable Google Workspace SSO
There are four steps to set-up the Google Workspace (formerly G Suite) SSO connection:
- Set-up Google Workspace application.
- Provide metadata to CheckFlow.
- Enable the application for users.
- Verify Google SSO is working with CheckFlow.
Contact Us
Please contact us prior to starting Step 1.
We will need to manually generate your Entity ID and ACS URL.
Step 1: Set-up Google Workspace application
- Login to your Google Admin console and go to Apps > Web and mobile apps.
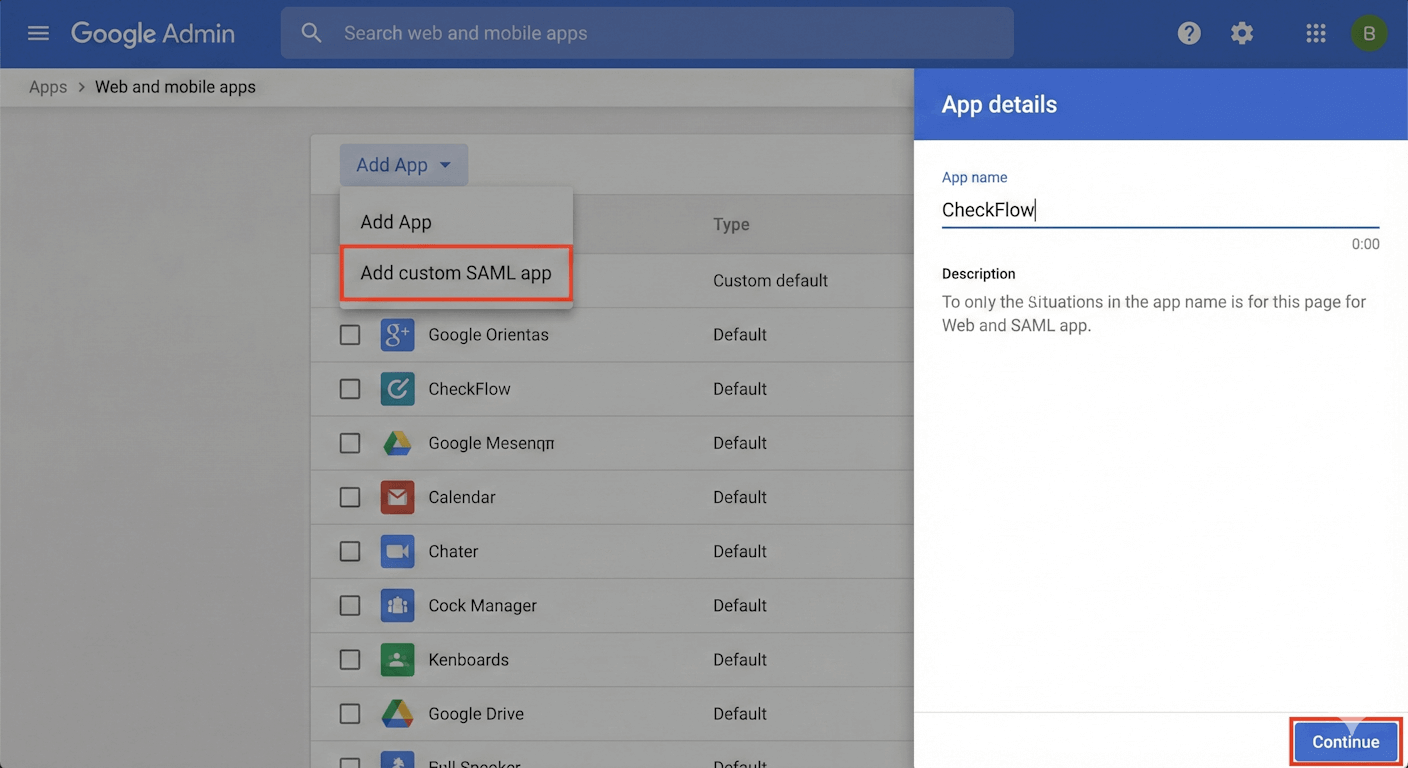
- Click the Add App dropdown menu and select Add custom SAML app.
- On the App Details page, enter CheckFlow as the App name. You can optionally upload an icon. Then click Continue.
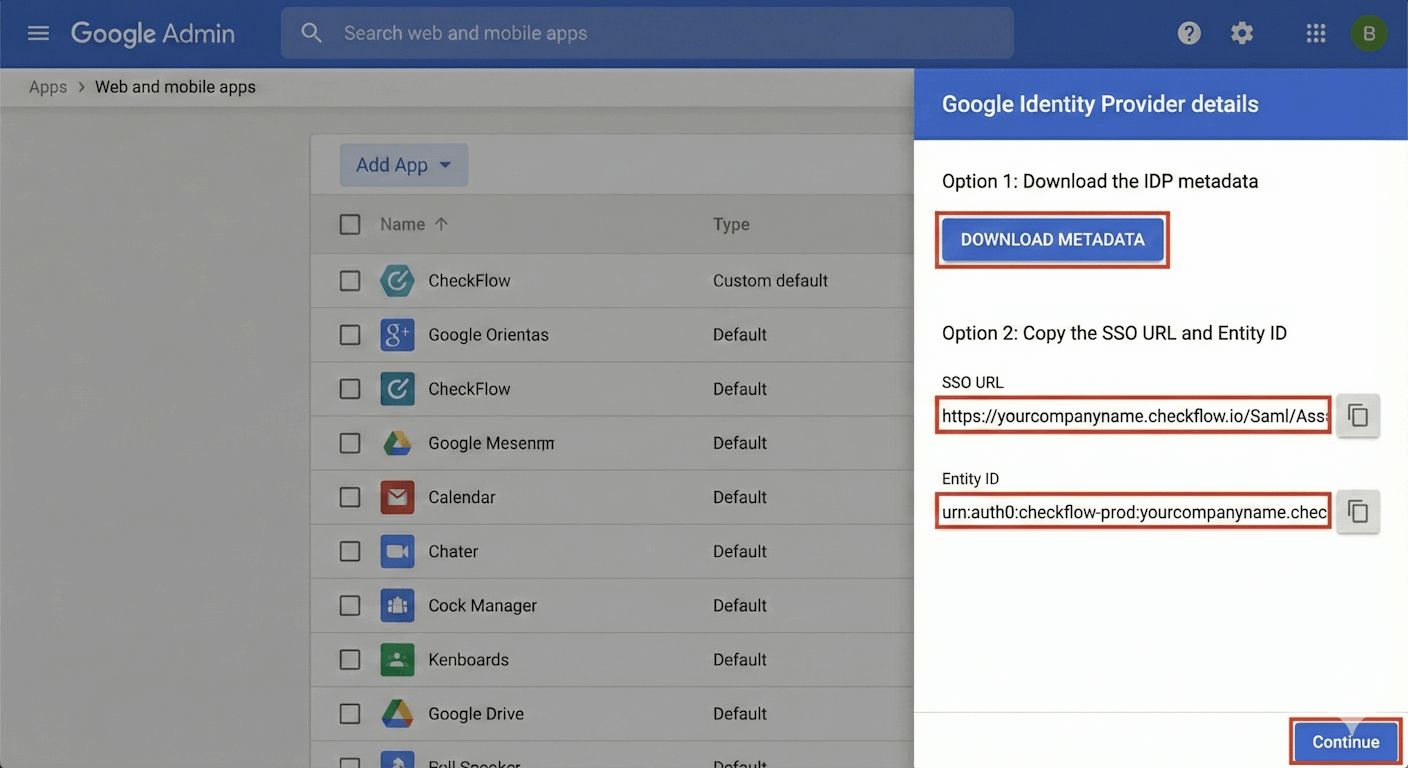
- You will now see the Google Identity Provider details page.
Important: Please download the IDP metadata file and save it for Step 2.
- Click Continue to proceed to the Service Provider Details page. Enter the following information:
- ACS URL: Provided by CheckFlow
- Entity ID: Provided by CheckFlow
- Example: urn:auth0:checkflow-prod:yourcompanyname.checkflow.io
- Name ID format: EMAIL
- Name ID: Basic Information > Primary email

- Click Continue to proceed to the Attribute Mapping page.
- Click Add Mapping to create the following attributes:
- email
- Google Directory attributes: Basic Information > Primary email
- App attributes: email
- firstName
- Google Directory attributes: Basic Information > First Name
- App attributes: firstName
- lastName
- Google Directory attributes: Basic Information > Last Name
- App attributes: lastName
- role (optional)
- Google Directory attributes: Map this to a custom attribute if you have one for user roles.
- App attributes: role
- Notes: This can be: 'administrator', 'member' or 'guest'. Defaults to 'member' if this attribute is not created.
- timeZone (optional)
- Google Directory attributes: Map this to a custom attribute if you store user time zones.
- App attributes: timeZone
- Notes: This can be any IANA Time Zone (TZDB) ID. For example: 'Europe/London', 'America/New_York'. Defaults to 'UTC' if this attribute is not created.
Optional Attributes
The role and timeZone attributes are optional. These properties can easily be changed within the 'Team Management' and 'User Settings' pages in CheckFlow at any time.
- Click Finish.
Step 2: Provide metadata to CheckFlow
The identity provider metadata allows for dynamic configuration. This simplifies the SAML setup process.
- If you did not download the metadata in Step 1, go to your CheckFlow app in the Google Admin console.
- Click on Download Metadata.
- Send the IDP metadata file (XML) to us. We will then add this to your account.
Step 3: Enable the application for users
- From your Google Admin console, go to Apps > Web and mobile apps.
- Select the CheckFlow app.
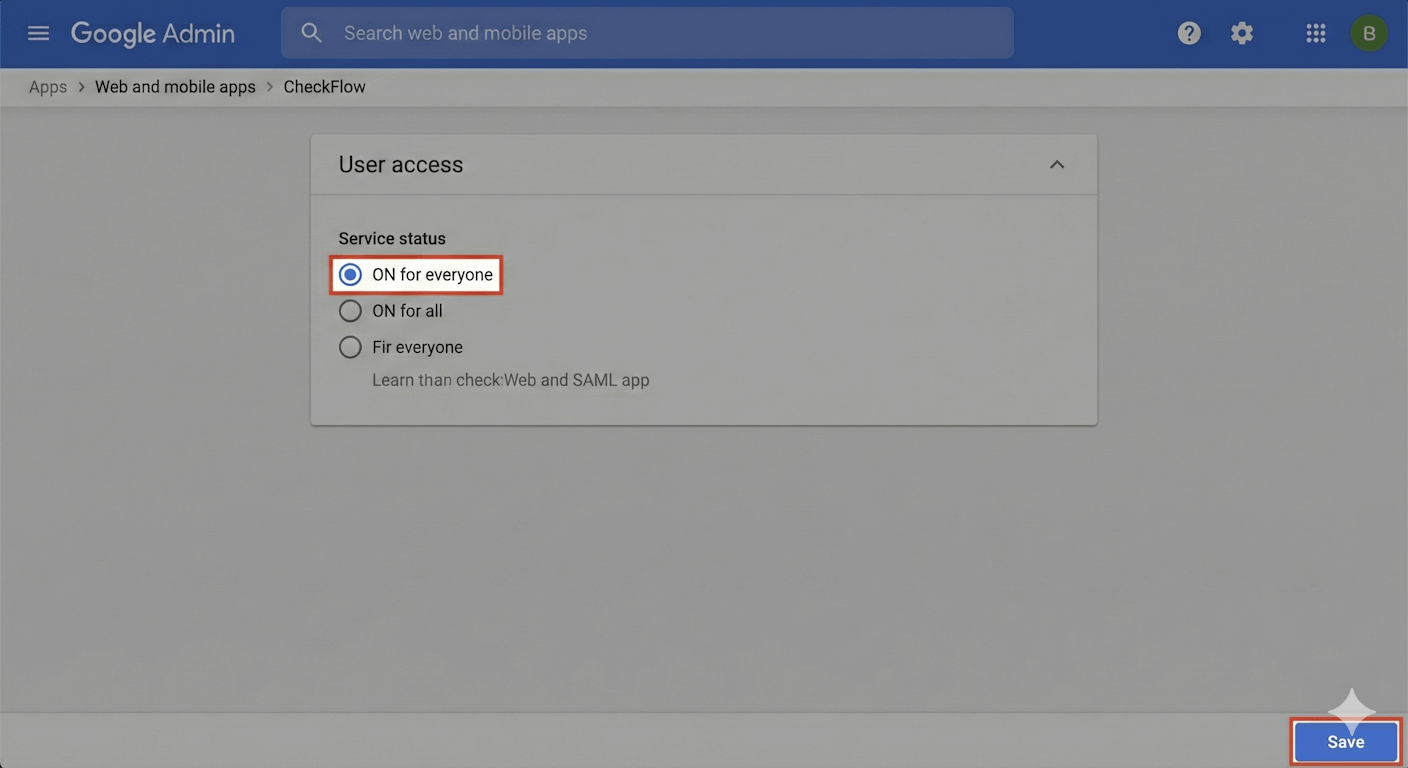
- Click on User access.
- To turn the service on for everyone in your organization, click ON for everyone and then click Save.
- Alternatively, you can turn the service on for specific Groups or Organizational Units using the menu on the left.
Step 4: Verify Google SSO is working with CheckFlow
All users that have been assigned to your newly created Google application should now be able to access CheckFlow using Google SSO.
New user accounts are created the first time a user logs in to CheckFlow.
Simply open a new tab in your browser and access CheckFlow using your custom URL.
For example: https://yourcompanyname.checkflow.io/