Conditional Logic
Our Conditional Logic feature allows you to create If > Then rules to show or hide entire tasks and any content controls within your tasks.
You can use these rules to create truly dynamic workflows that are responsive to the input provided by the user.
Example Use Cases
- You have an Employee Onboarding process. You have some tasks that are only applicable to IT employees and other tasks that are only applicable to Marketing. You could hide the department specific tasks by default and set up a rule to show the relevant tasks when the Department drop down control value is changed.
- You have a Customer Setup process. You have a multi-select control listing the products the customer has purchased. When the "Web Hosting" product is selected a drop down control can be shown within the same task that asks for a "Tier" to be selected.
Triggers & Actions (If > Then)
Conditonal logic rules are comprised of two parts. The trigger (If) and the action (Then).
The trigger is what causes the rule to run. Triggers can be bound to the values entered in to the following content controls:
- Drop Down
- Multi Choice
- Short Text
- Long Text
- Website
- Date
The action is what happens when the rule is run. The actions possible are to show or hide one or more tasks, headings and/or content controls within your checklist.
Setting Up Conditional Logic
Conditional Logic rules are created in your Template.
We recommend that you build as much of your process as possible before creating any Conditional Logic rules. At a minimum you will need to create the trigger control and the elements (tasks, headings and content controls) you want to show or hide.
The two key parts to Conditional Logic are the initial visibility and the rules that determine when the visibility should be changed. Both of these are controlled from the 'Conditions' popup, which is discussed in further detail below.
Creating Conditional Logic Rules
Open your template and select the task containing the control that the rule will be triggered from.
Click on the 'Conditional Logic' button located at the top of task content area to open the 'Conditions' popup for the selected task.

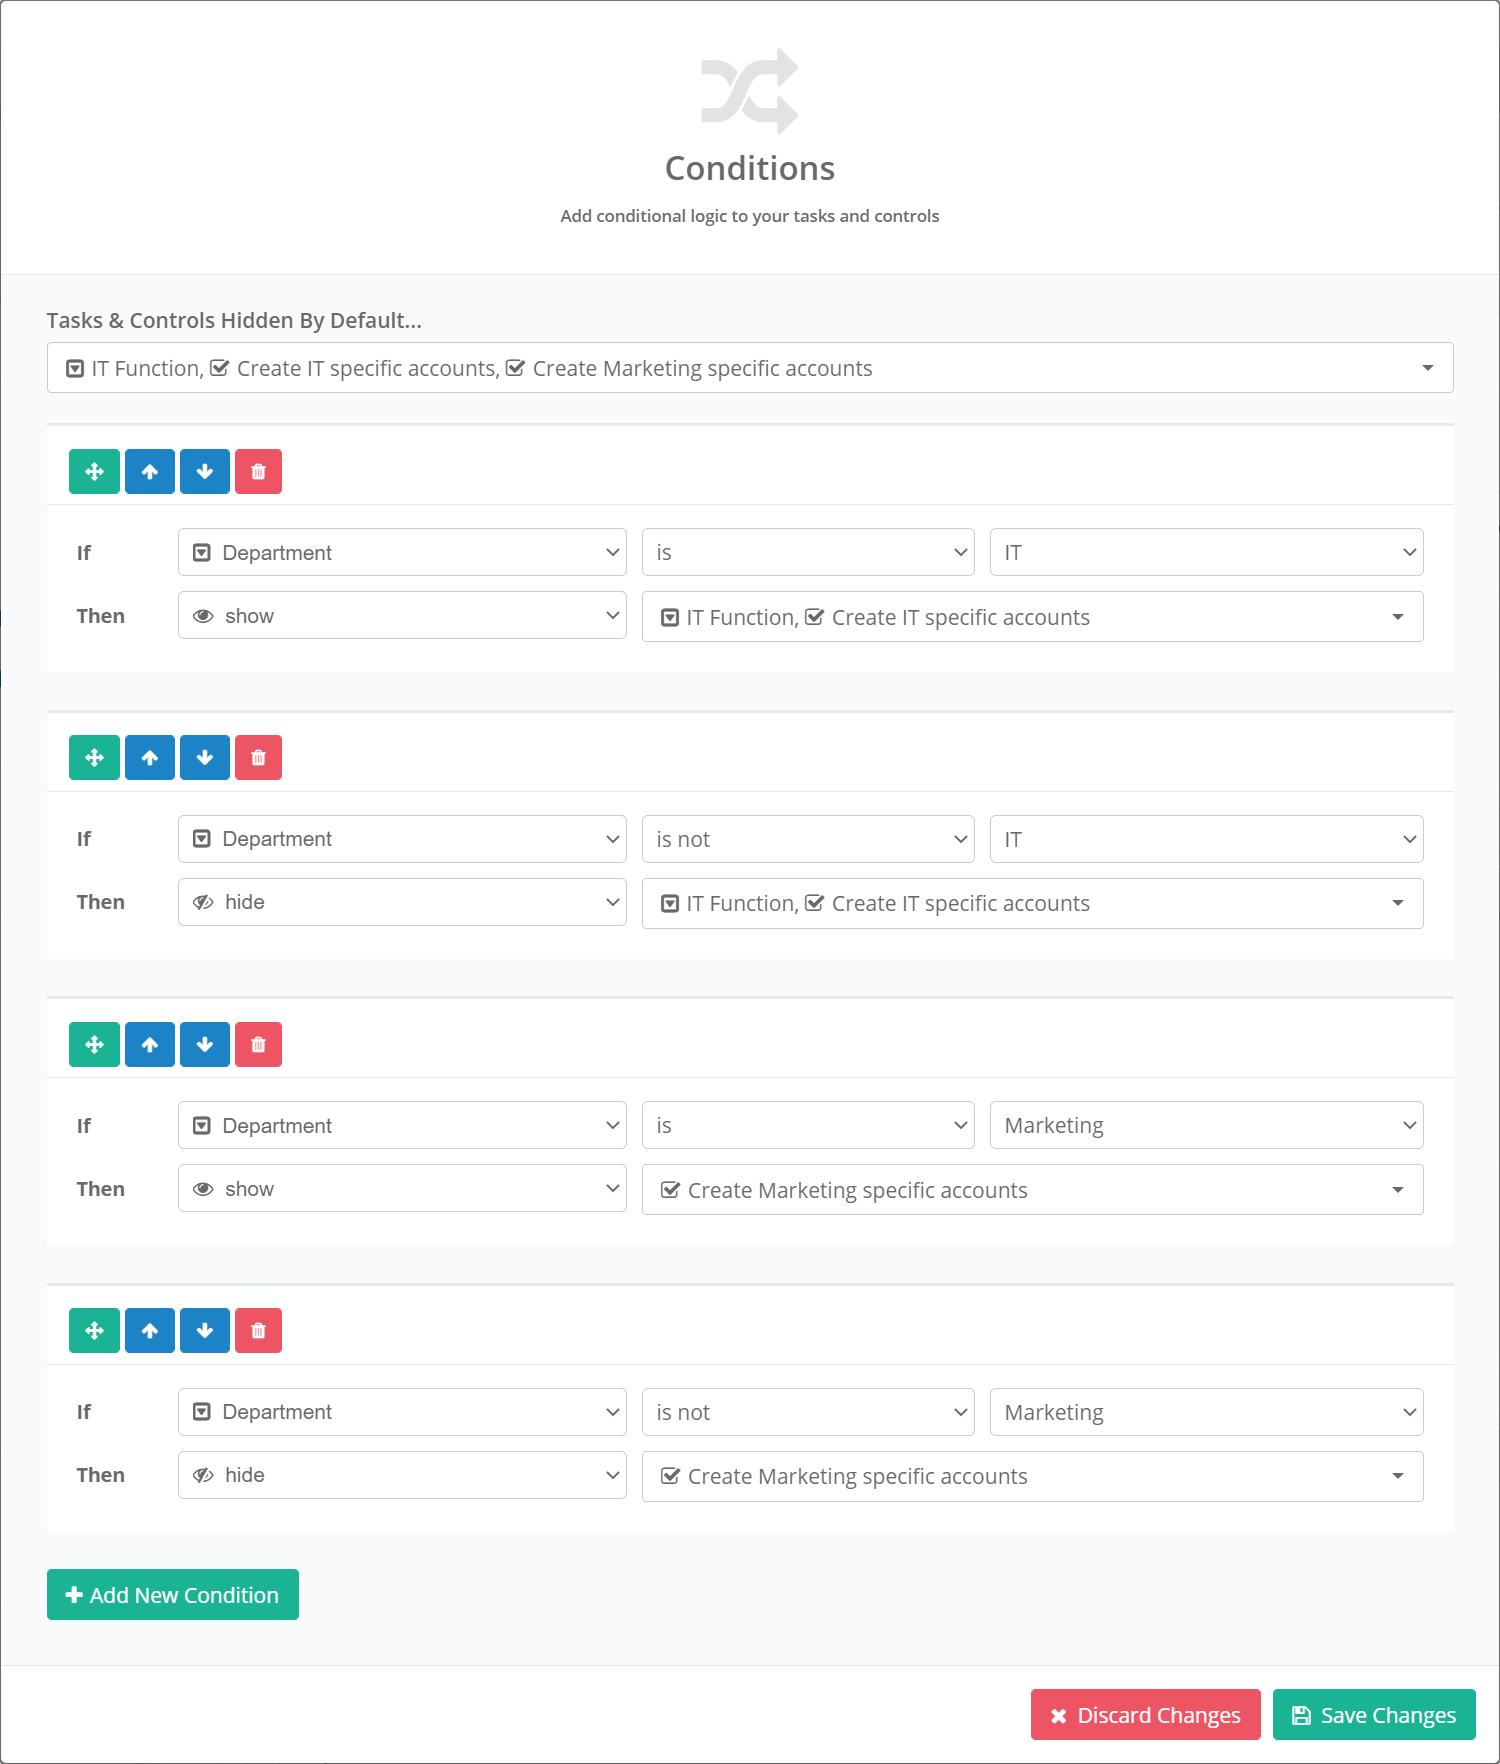
Use the multi choice control labeled 'Tasks & Controls Hidden By Default...' to select the tasks, headings and content controls that you would like to be hidden when your checklist is initially created.
Click the 'Add New Condition' button to create a new conditional logic rule.
For each new rule you create you will need to specify the trigger (If) and the action (Then).
For the Trigger (If): Select the field that you want to trigger off, then select the condition and finally the value.
For the Action (Then): Select the effect (show or hide) and then select the tasks, headings and content controls that are affected.
Reverse Logic
In most scenarios you will need to create a second rule to reverse your logic.
For example: If you are showing a task based on the selected value of a drop down control you will also need to create a second rule to hide the task when the drop down value is not selected.
Conditional Logic In Action
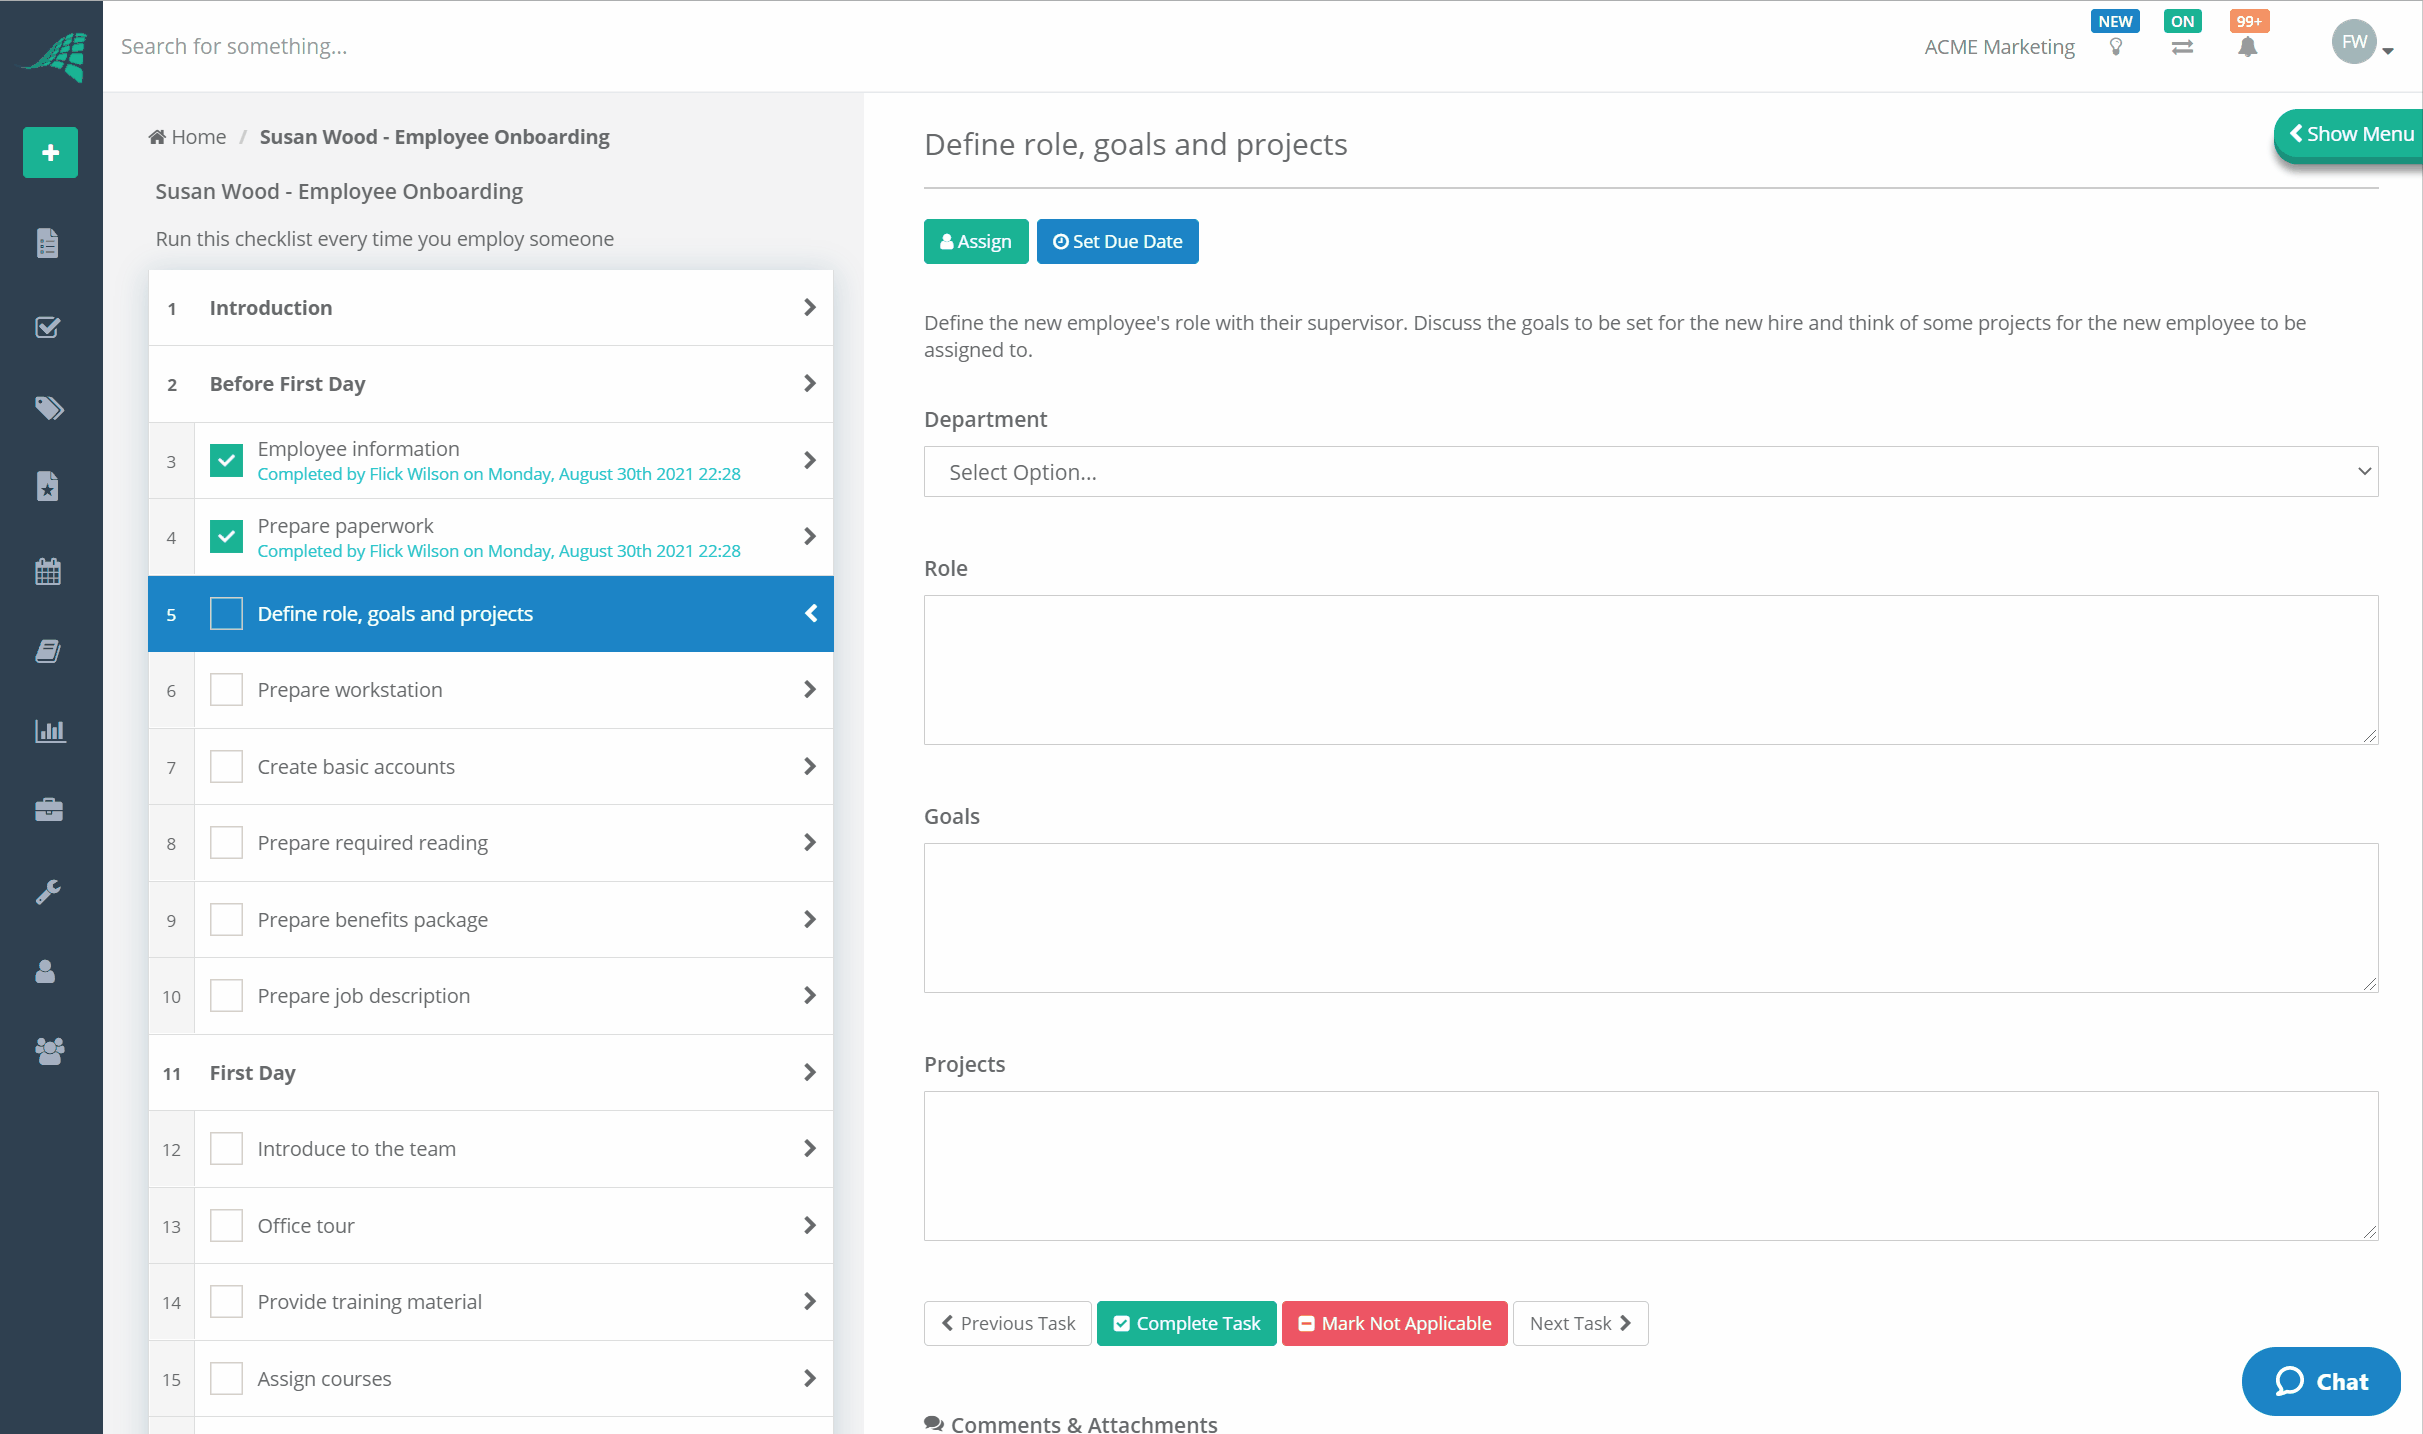
In the example we have been working with we have used the scenario of an Employee Onboarding checklist. We have set up some rules to show and hide specific tasks and controls depending on the value entered in the 'Department' drop down control.
As you can see below, when the 'IT' department is selected a second drop down is shown prompting the user to select an 'IT Function'. In addition, the task 'Create IT specific accounts' is shown.
When we select 'Marketing' the previous task and the 'IT Function' drop down is hidden and the task 'Create Marketing specific accounts' is shown.
When we select 'HR' both of the department specific tasks are hidden.