Tags
Tags can be added to checklists, tasks and templates. They allow you to group your data in any number of ways.
Every tag you create is displayed in our Tags Menu. From there you can click a tag to view all tagged items.
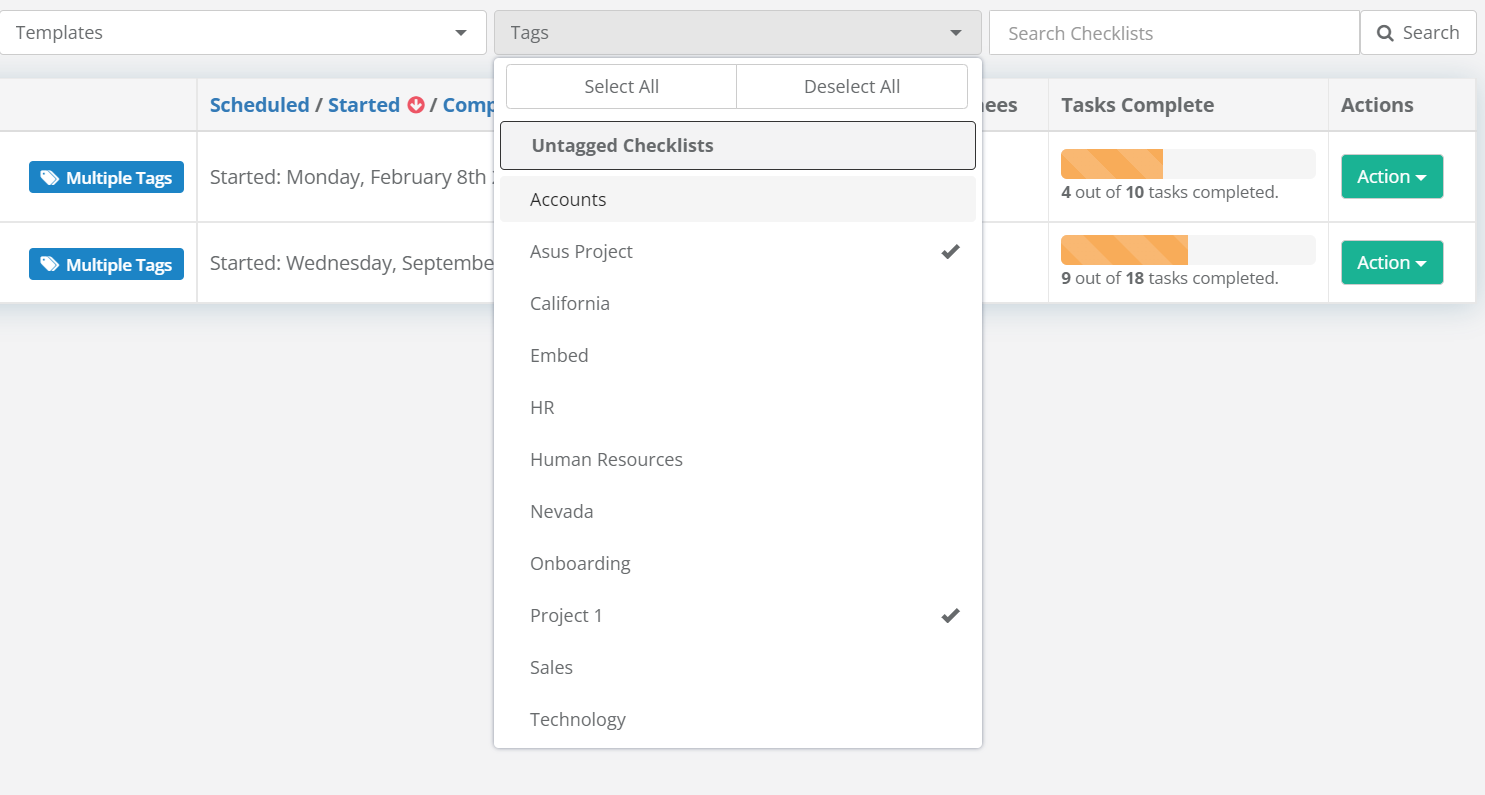
You can also use the Tags Filter in our Checklist Dashboard to filter the data grid.
Example Use Cases
Tags are all about grouping related items and having easy access to them. Here are some common examples:
- Projects - Your team works on a number of different projects. Each project has multiple checklists. You want to view all of the checklists for a specific project in one place.
- Priority - You want to tag your VIP customers so that they can be prioritized.
- Regions - You have a number of regional Sales teams. You want to group your Sales checklists by region so that each team can quickly access their own data.
- Product Type - You have a dozen different product types that you bring to market with your Product Launch checklist. You want to group these by Product Type so that you can manage them in batches.
Creating and Managing Tags
Tags can be added on a one off basis to checklists and tasks.
You can also add tags to templates and the tasks within your templates. The tags you add in your template are automatically inherited in every derived checklist.
For example, if you have an Employee Onboarding template and you tag it with the Onboarding tag any checklist based on that template will have the Onboarding tag.
The following sections describe how to create and manage these tags in more detail.
Checklist Tags
Open your checklist and expand the menu by clicking on the Show Menu button.
Within this menu is a text box labelled Checklist Tags.
To tag your checklist start typing the tag name in this text box. If you are using an existing tag it will autocomplete. If it is a new tag it will be created as soon as you move focus from the text.
A tag is added when the text changes to a light blue label. See the example of the Onboarding tag below:
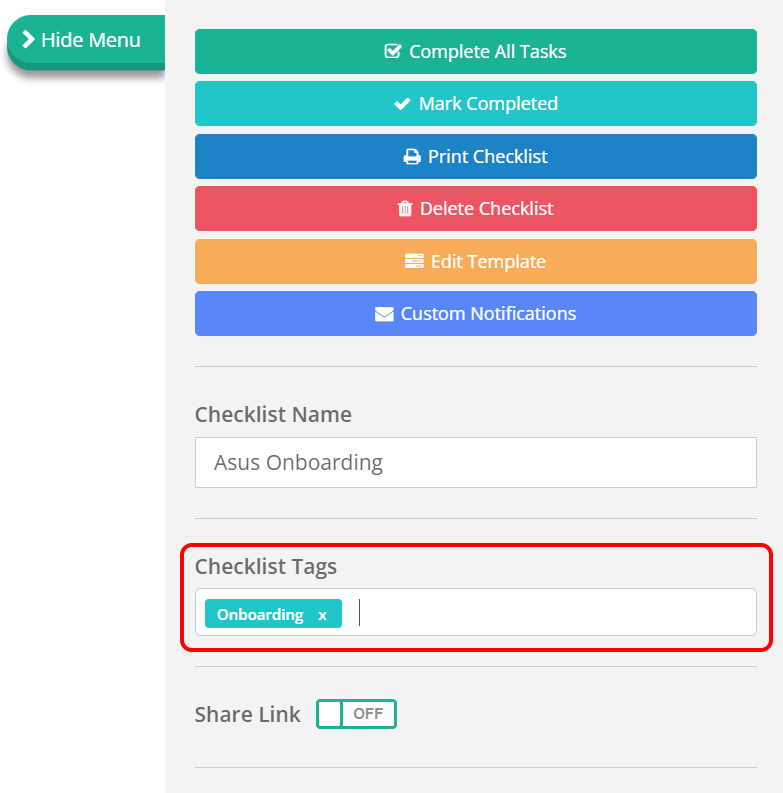
You can add as many tags as you need.
To remove a tag click the small cross on the right side of the tag label.
Task Tags
Open your checklist and select the task you want to tag.
At the bottom of the Task Content area is a text box labelled Task Tags.
To tag your task start typing the tag name in this text box. If you are using an existing tag it will autocomplete. If it is a new tag it will be created as soon as you move focus from the text.
A tag is added when the text changes to a light blue label. See the example of the Asus Project tag below:
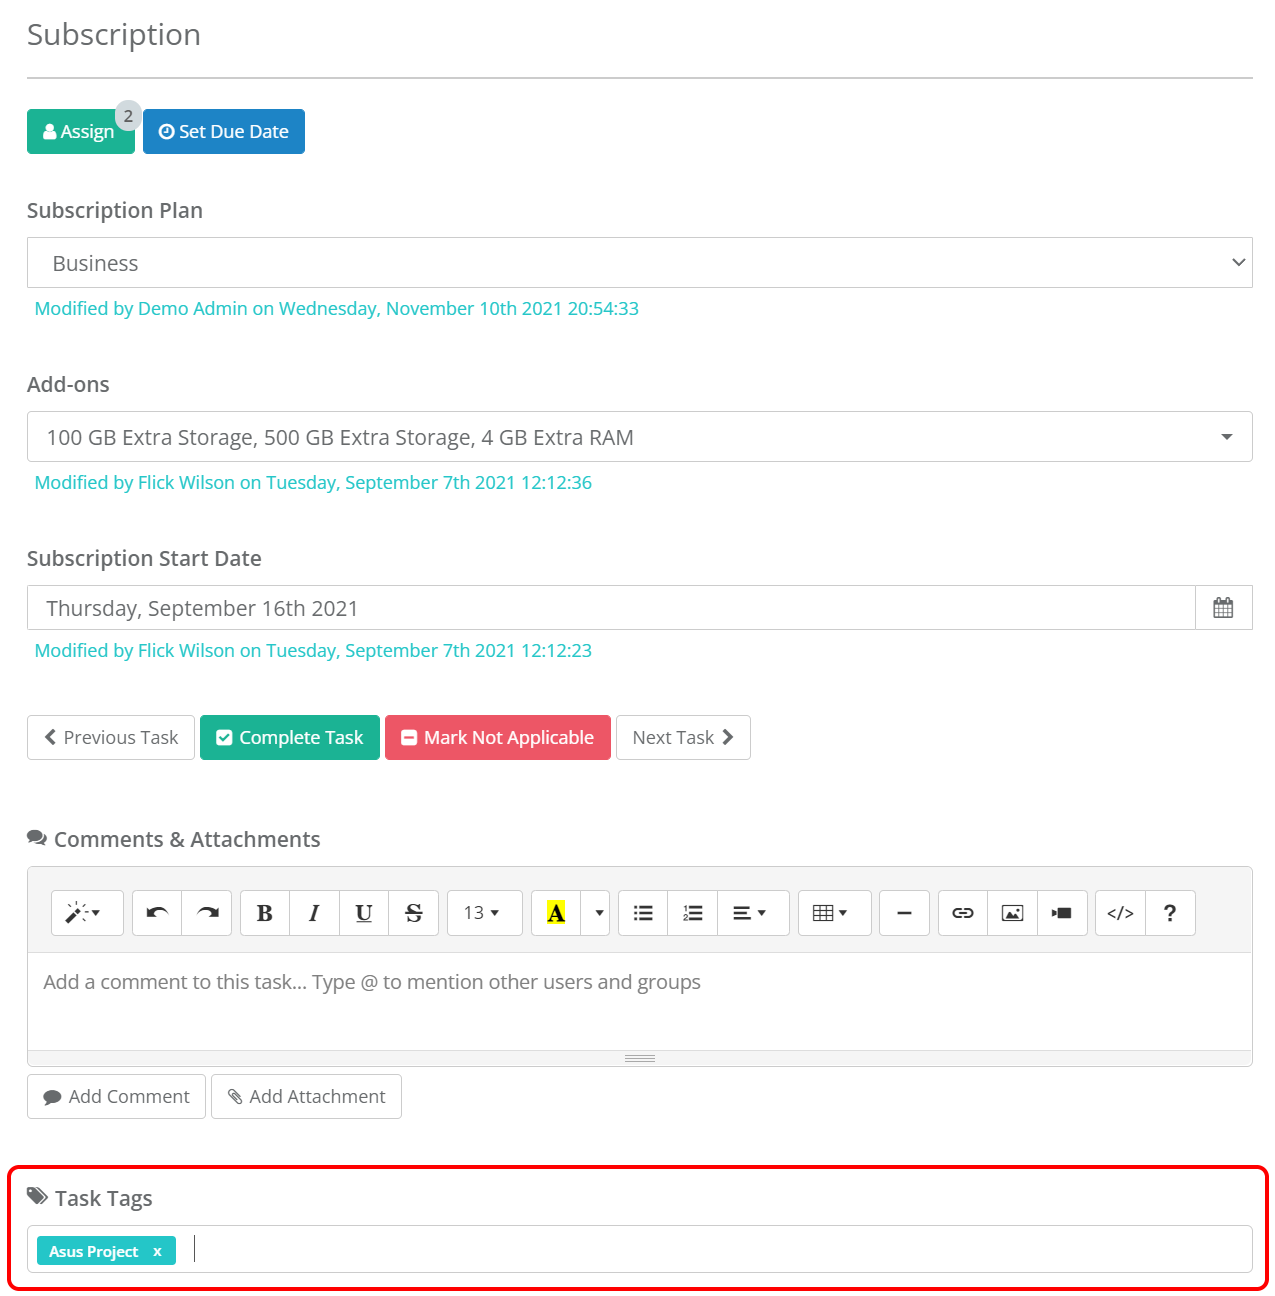
You can add as many tags as you need.
To remove a tag click the small cross on the right side of the tag label.
Template & Template Task Tags
Template tags are slightly different. Whereas tags applied to your checklists and tasks effect only those items. The tags you create in your template are inherited by all checklists derived from your template.
You can create Template Tags, which are inerited in derived checklists as checklist tags.
You can also create Template Task Tags, which are inherited in derived checklists as task tags.
To create these tags you need to open your template and click the Settings button. Then click the Tags button from the sub-menu that appears.
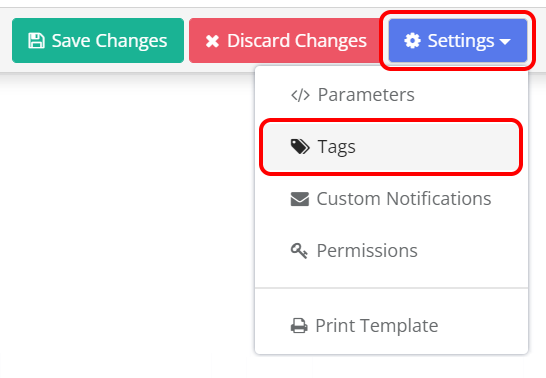
The Tags popup form will be displayed. This form contains two tabs.
Template Tags
The Template Tab allows you to create you template tags. Within this tab is a text box labelled Tags.
To tag your template start typing the tag name in this text box. If you are using an existing tag it will autocomplete. If it is a new tag it will be created as soon as you move focus from the text.
A tag is added when the text changes to a light blue label. See the example of the Onboarding tag below:
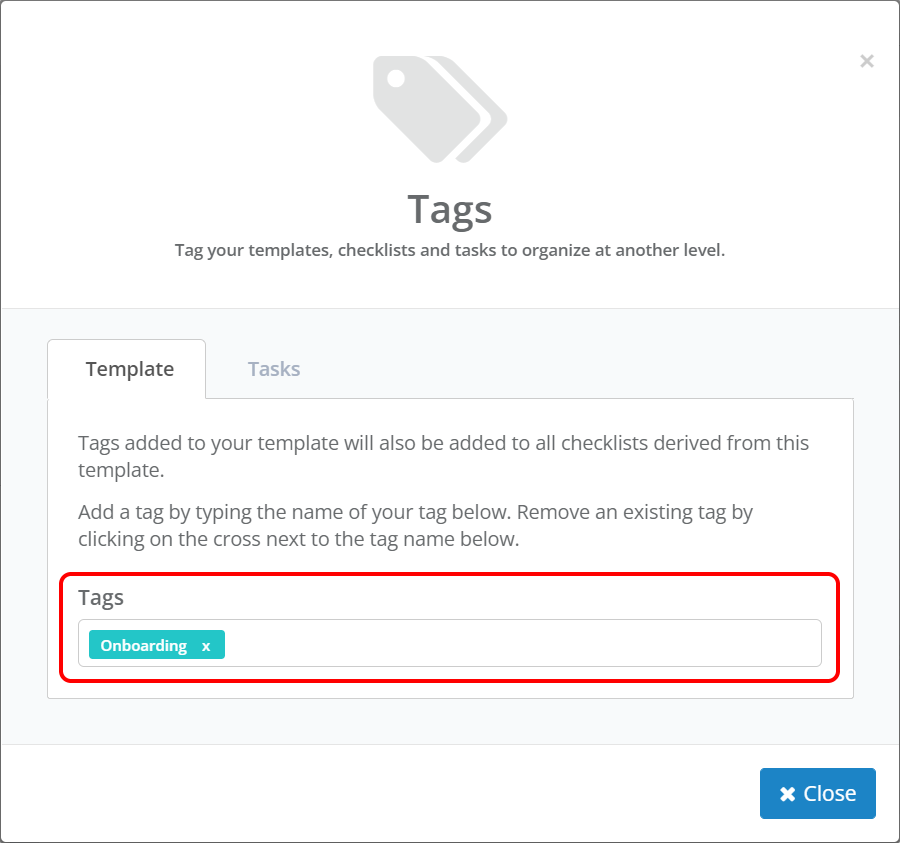
You can add as many tags as you need.
To remove a tag click the small cross on the right side of the tag label.
Template Task Tags
The Tasks Tab allows you to create tags on the tasks within your template.
Each task is displayed in an ordered list within this tab. Each task has a text box on the right side of this list. This is used to create and manage the tags for the task.
To tag a task start typing the tag name in the task text box. If you are using an existing tag it will autocomplete. If it is a new tag it will be created as soon as you move focus from the text.
A tag is added when the text changes to a light blue label. See the examples of the Line Manager, HR and IT tags below:

You can add multiple tags to all tasks.
To remove a tag click the small cross on the right side of the tag label.
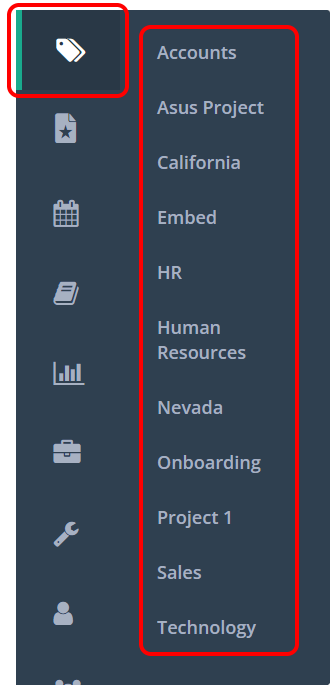
Tags Menu
The Tags Menu button is displayed when one or more tags exist.
Hover over the button to display a sub-menu containing all tags listed in alphabetical order.
Click a tag to view all checklists, tasks and templates with the selected tag.
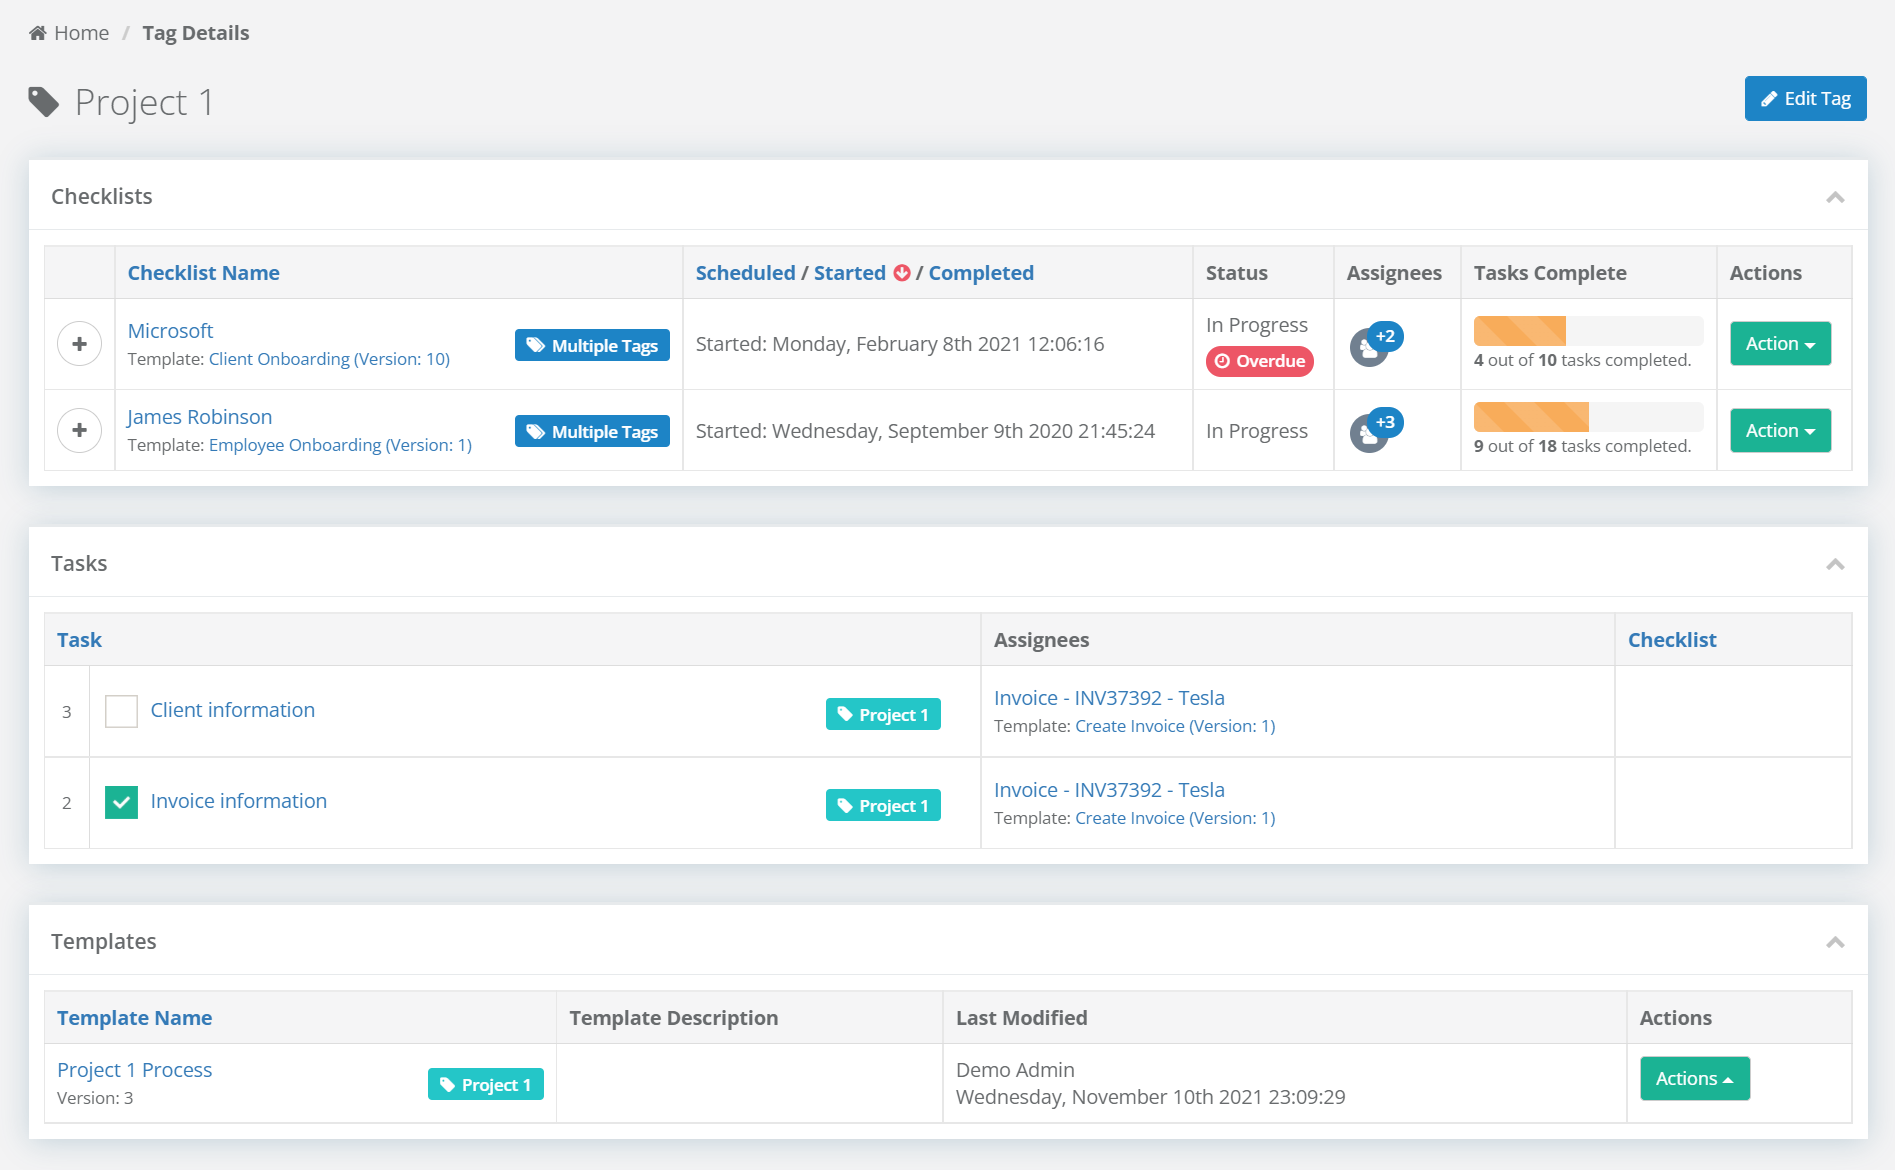
Viewing Tagged Items
When you click a tag in the Tags Menu all checklists, tasks and templates with the selected tag are displayed in the Tag Details screen.
This allows you to see all of the tagged items in one click.
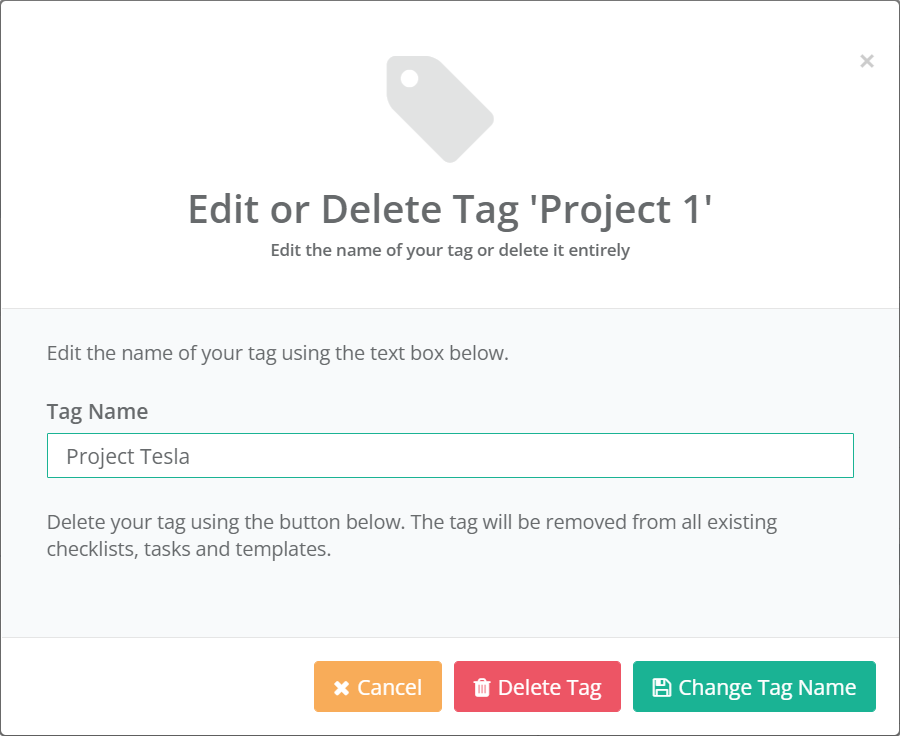
Changing or Deleting Tags
To change the name of a tag or delete a tag entirely click the tag from the Tags Menu to open the Tag Details screen.
Click on the Edit Tag button located in the top right of this screen.
The Edit or Delete Tag popup form will be displyed. Use this to take either action.
Tags Filter
You can use the Tags Filter located at the top of the Checklist Dashboard to filter the checklists displayed in the grid by the selected tags.