Share a Checklist
You can share a checklist with anyone by creating a Share Link.
The person you share the link with will be able to access the checklist, enter values in to the controls, upload files and complete tasks.
They won't even need to have a CheckFlow account to do this.
Usage Scenario
Imagine your business needs to collect a lot of data from new clients. Example businesses could be:
- Accountants
- Lawyers
- Real Estate Agencies
- Marketing Agencies
Email is not the best way to do this. It often leads to time consuming back and forth communication.
A more efficient process is to ask your clients to complete a shared checklist. The shared checklist will ensure that all of the data is gathered without any input from yourself.
To do this, start by creating a template with the tasks and controls you need to gather the data from your new clients.
You can use our basic Client Onboarding Template as a starting point. Just import this template and customize it for your own use.
Once your template is created you can simply create a new checklist and generate a share link for each new client.
Then send the share link to your client. Your client can use that link to access the checklist and complete it.
You will know exactly when a checklist has been completed as our real-time technology will update you immediately.
Create a Share Link
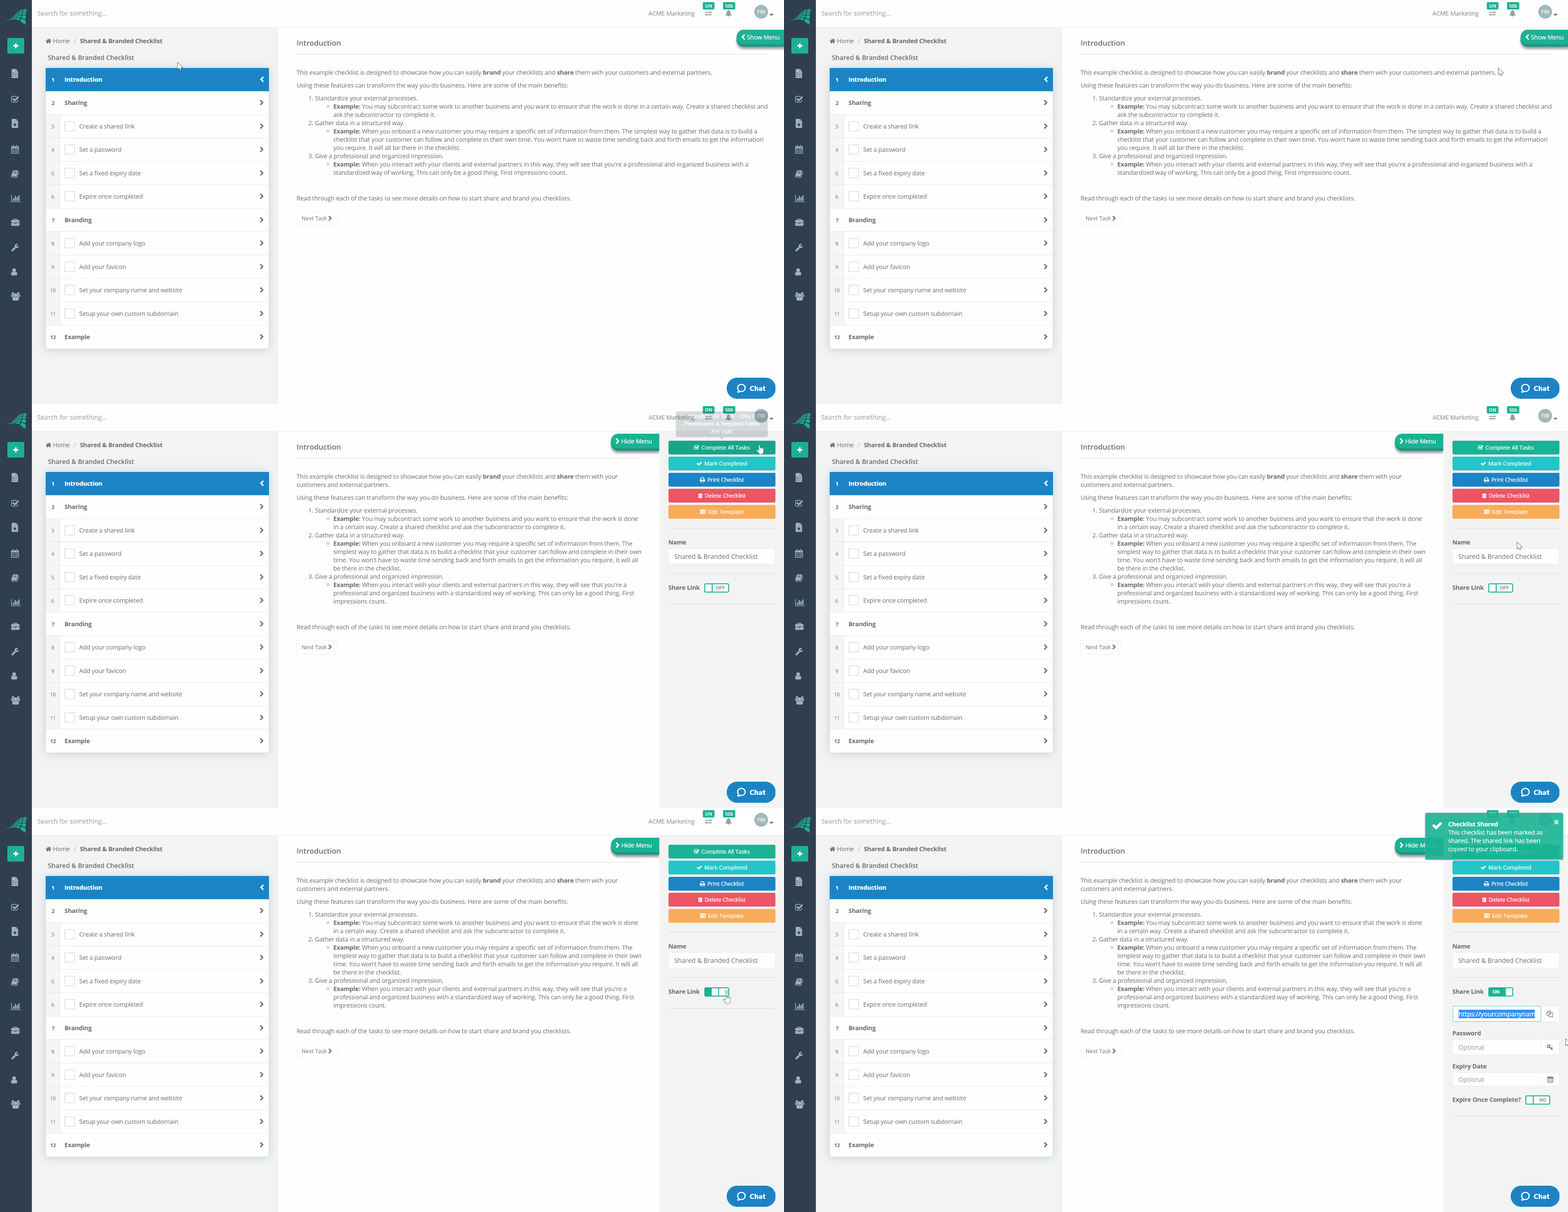
Open the checklist you want to share.
Click on the 'Show Menu' button located on the right side of the screen.
The checklist menu will expand. Click on the toggle switch labelled 'Share Link' so that the toggle switch shows 'ON'.
Your share link will be generated and displayed in a text box located beneath the toggle switch. Click the text box to copy the share link to your clipboard.

Add a Password
You can secure access to your shared checklist by setting a password.
Click the key icon on the Password text box to automatically generate a password.
Make sure you note down the password as it is only visible when it is generated. If you come back to the checklist at a later date the password will not be visible.
You can generate a new password as many times as you like. You can also set the password manually.
When a password has been set a prompt will be displayed asking the user to enter the password prior to being granted access.
Deny Access After a Specific Date
You can deny access to your shared checklist after a specific date and time.
To do this click on the Expiry Date textbox. A calendar control will open. Use this control to specify the date and time you want to expire access from.
If someone tries to access your shared checklist after the expiry date they will be denied access.
Deny Access After the Checklist Has Been Completed
You can deny access to your shared checklist after it has been completed.
To do this click on the Expire Once Complete? toggle switch so that it is set to YES.
If someone tries to access your shared checklist after it has been completed they will be denied access.
Remove a Share Link
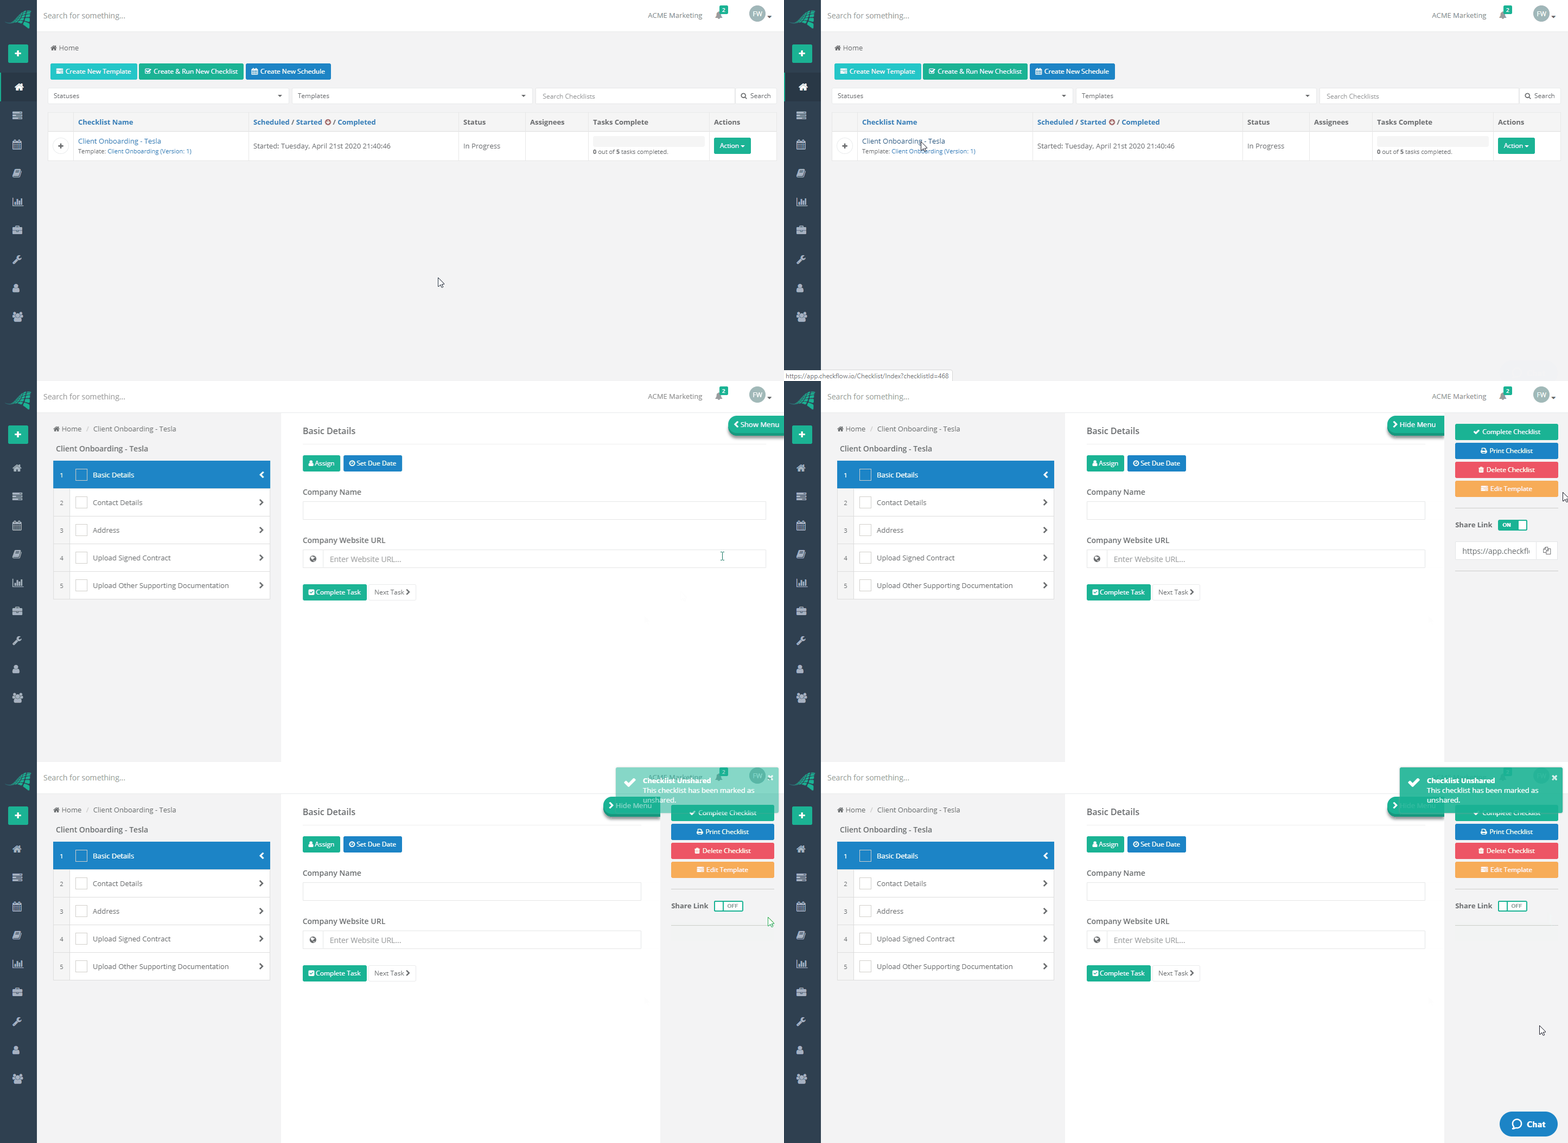
Open the checklist you want to share.
Click on the 'Show Menu' button located on the right side of the screen.
The checklist menu will expand. Click on the toggle switch labelled 'Share Link' so that the toggle switch shows 'OFF'.
The checklist share link will be deleted and it will no longer be possible to access the checklist anonymously via the previously generated share link.

Open and Complete a Shared Checklist
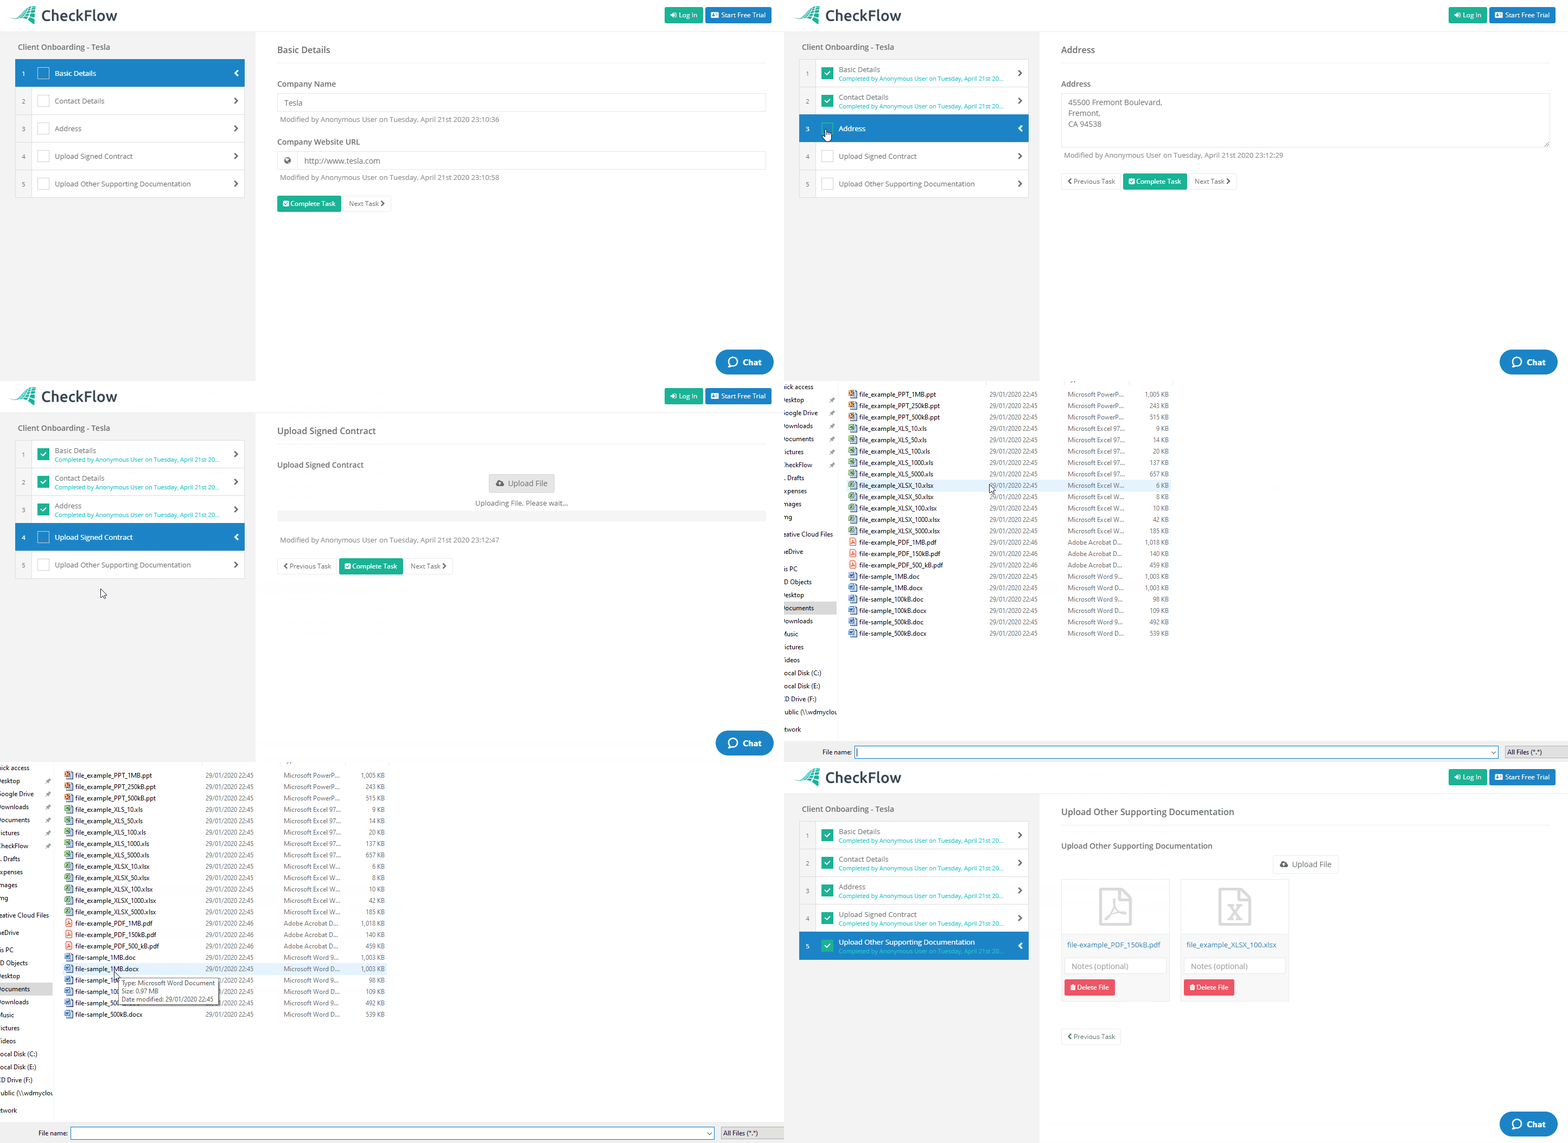
To open a shared checklist simply click the share link. The share link is constructed using a universally unique identifier (UUID).
Shared checklists are very similar to normal checklists. The only differences are as follows:
- The user name logged when a task or field is completed is 'Anonymous User'.
- The user cannot assign tasks to other users.
- The user cannot set task due dates.
- The checklist menu is removed. Therefore, the user cannot delete, print, change settings etc.
- The CheckFlow navigation bar and tool bar are removed.
Members of your team can still access checklists that have been shared, and use them without any of the above restrictions. They need to be logged in to CheckFlow and access the checklist via the dashboard rather than the share link.

Example Shared & Branded Checklist
Here is an example of a shared and branded checklist: