Zapier + CheckFlow Integration
What is Zapier?
Zapier is an automation tool that you can use to connect CheckFlow with your favorite apps. You can automate repetitive tasks without having to write a single line of code. It's easy to build your own app workflows with just a few clicks.
For example, maybe you have a checklist that gathers client data and you want this data in Salesforce. You could open the checklist and manually copy the data in to Salesforce. Or, you can have Zapier automate this for you, saving you time and effort.
What Apps Can I Connect To?
There are currently over 2,000 apps you can connect to using Zapier. For a full list take a look at the Zapier Apps page.
Here are some of the most popular apps:
How Zapier Works
Zapier listens for events in one app, then automatically performs an action in another.
When this happens... Do this...This results in an automated workflow called a Zap.
Zaps always start with a trigger and end in an action. There can be multiple actions in a single zap.
CheckFlow has 3 triggers, 1 search, and 2 actions available through Zapier.
You can trigger an action in another application with these 3 options:
- New Checklist
- Task Completed
- File Uploaded
Search for a checklist using:
- Find Checklist
And perform the following actions:
- Create Checklist
- Share Checklist
Connect Your CheckFlow Account To Zapier
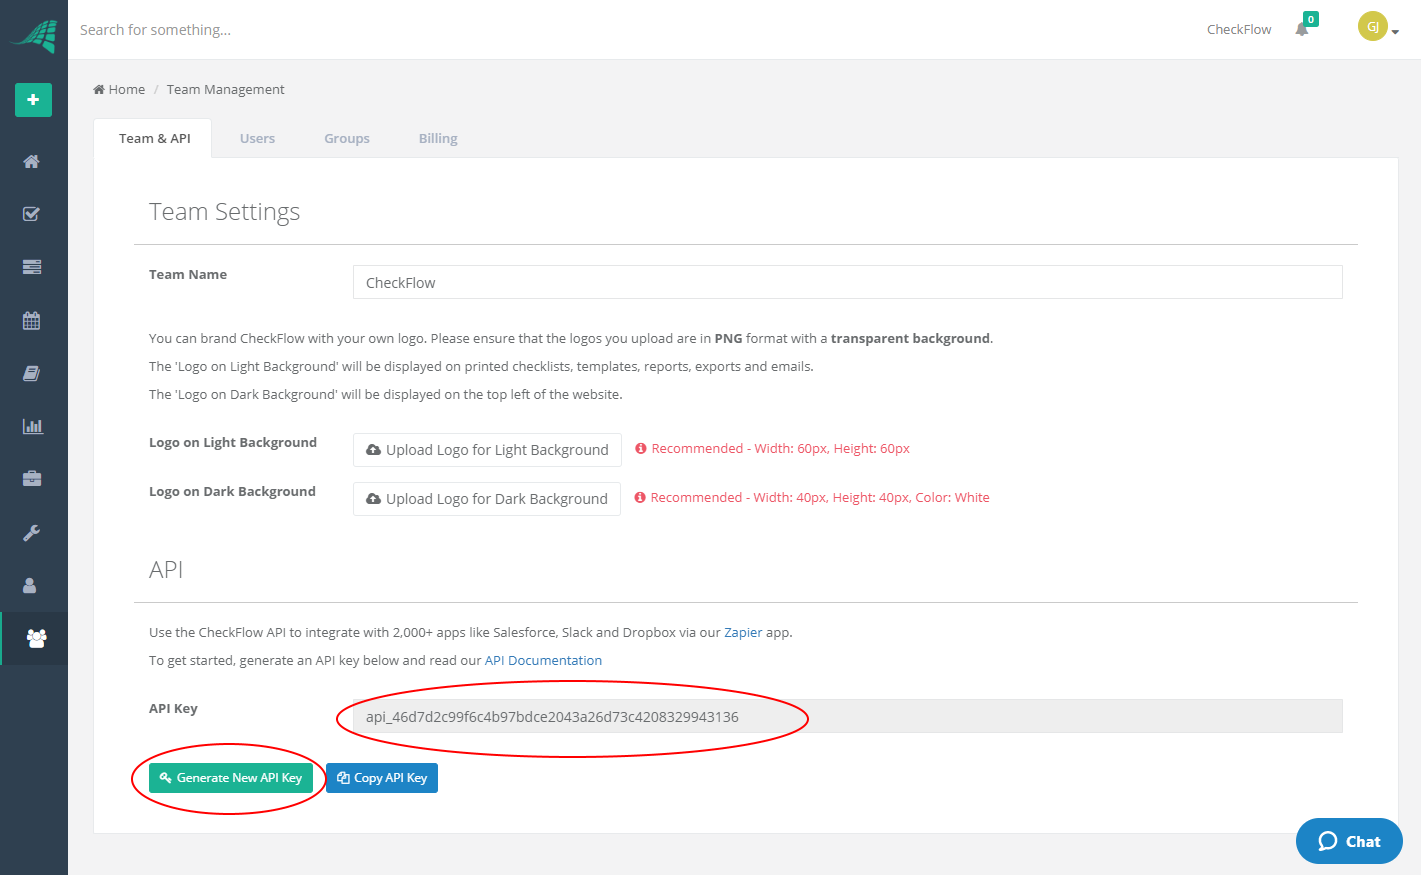
To connect your CheckFlow account with Zapier you must generate an API key.
You must be an Administrator to do this. Go to the Team Management page. Click on the 'Generate API Key' button and copy the API key that has been generated for you.
Now login to Zapier and connect to CheckFlow. The first time you connect, Zapier will ask you to enter the API Key generated previously.

Example CheckFlow Zaps
Example 1- On New Checklist -> Share -> Send Email
In this example we will create a three-step Zap as follows:
- Triggers when a 'New Checklist' is created in CheckFlow.
- Performs the 'Share Checklist' action in CheckFlow to generate a shared URL for the checklist.
- Sends an email using Gmail with details of the checklist and the shared URL.
PLEASE NOTE
For Zapier to successfully pull sample data, the action you are triggering must have been completed at least once. In this example our trigger is 'New Checklist', so you should have created at least one checklist for the relevant template.
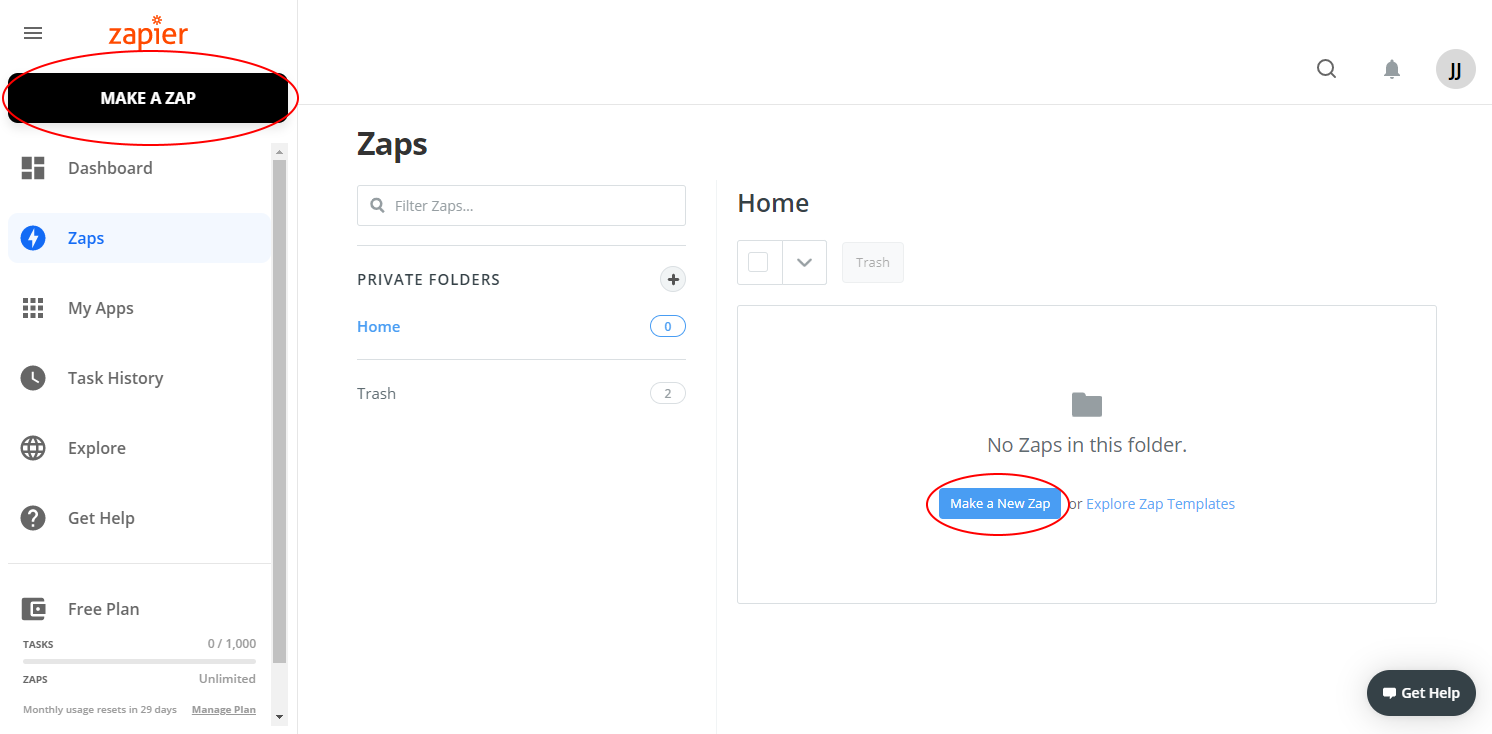
From the Zapier Dashboard, click one of the two buttons available to make a new Zap. The buttons are highlighted with a red circle in the screenshot below:
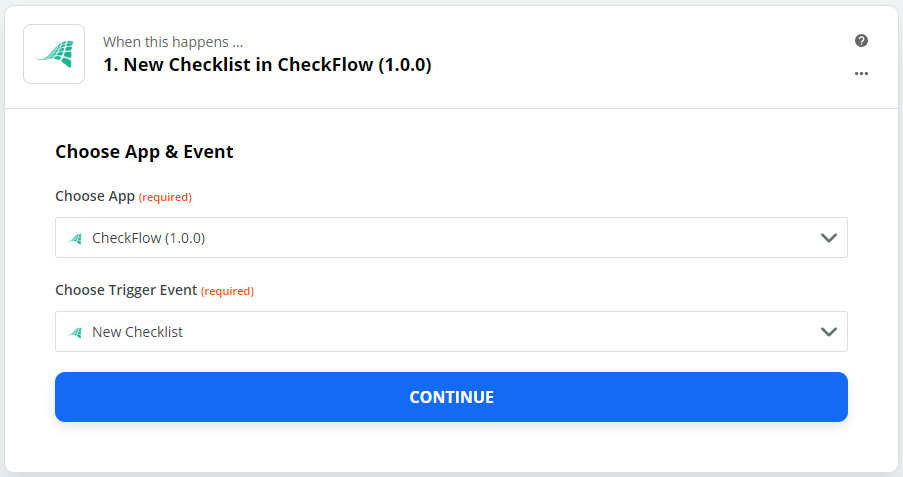
You will then be asked to choose your app and event. Select the CheckFlow app and the New Checklist event.
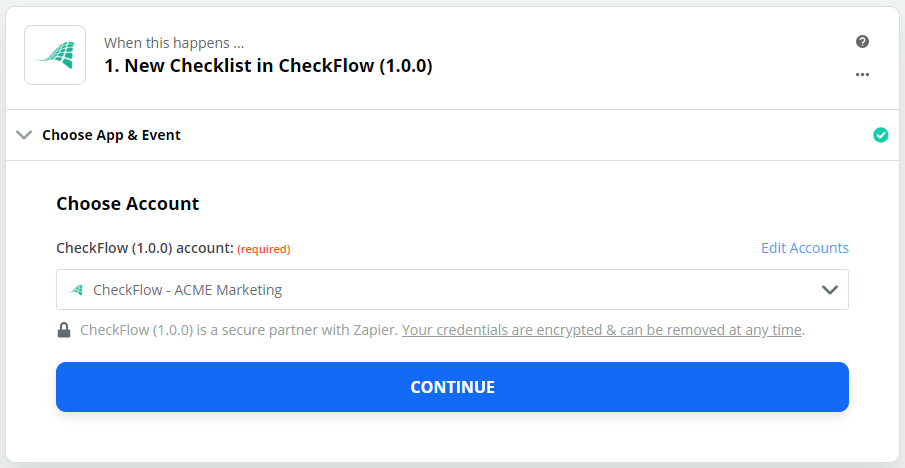
Next, you will be asked to choose your account. There should be just one account listed here. Select your account and continue.
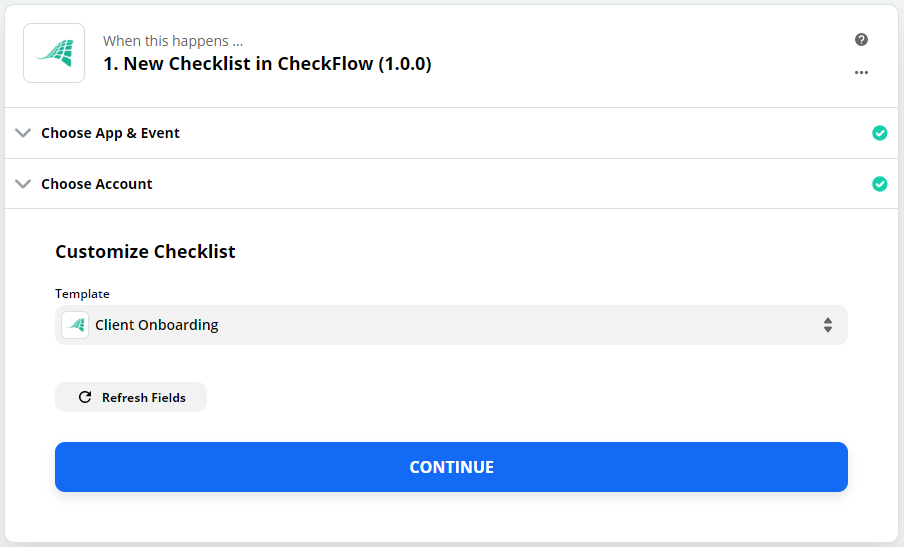
The next screen asks you to select a Template. This is the template the new checklist will be derived from. Therefore, this event will trigger every time a new checklist is created from the selected template.
You will then be prompted to find some data. You must have created at least one checklist from the template selected in the previous step. If not, Zapier will not be able to give you any test data to work with.
If some data is found you can review it and click continue. The trigger part of this Zap is now complete.
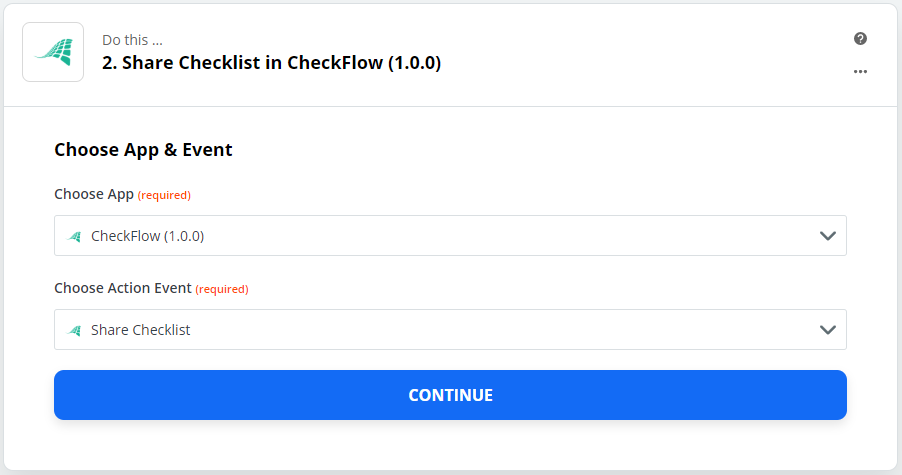
You are now going to build the first "Do this..." action. In this example we're going to share the newly created checklist.
Select the CheckFlow app again. We're keeping it simple to start with...
Choose your CheckFlow account again on the next screen and continue.
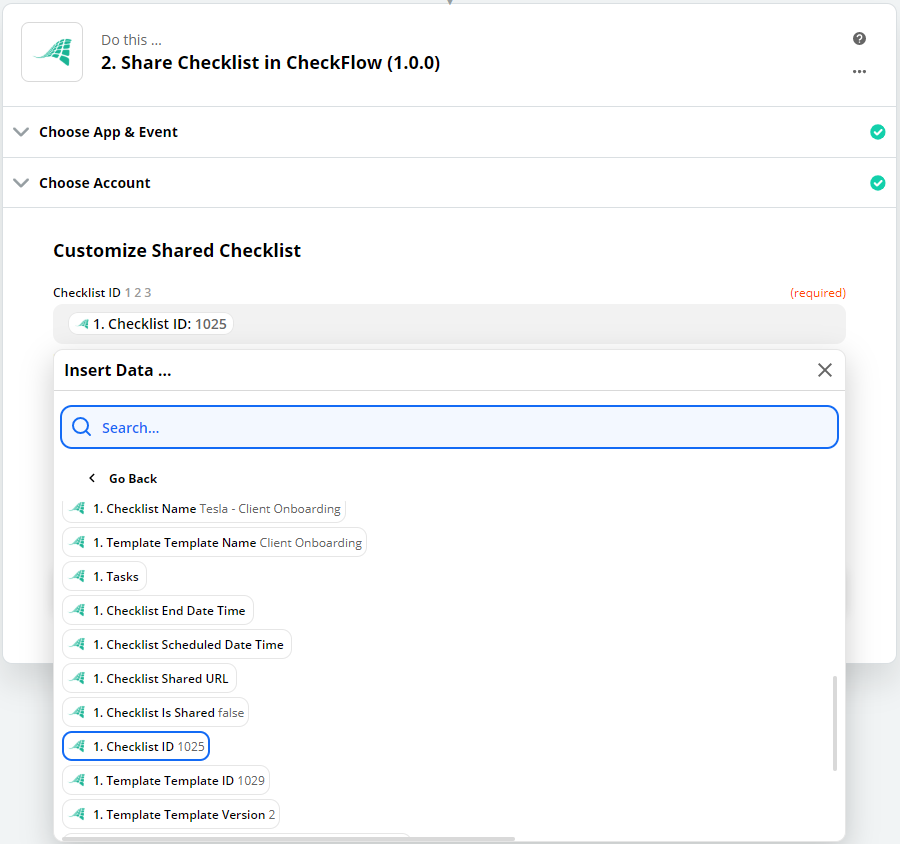
Now, this is where it gets interesting. You must use this next screen to map the Checklist ID from the New Checklist event to the Shared Checklist Checklist ID parameter.
To do this, click on the Checklist ID text box and then click on the 'More Options' button to show all of the avaliable fields. Scroll down and find the Checklist ID field. Your screen should look like the screenshot below.
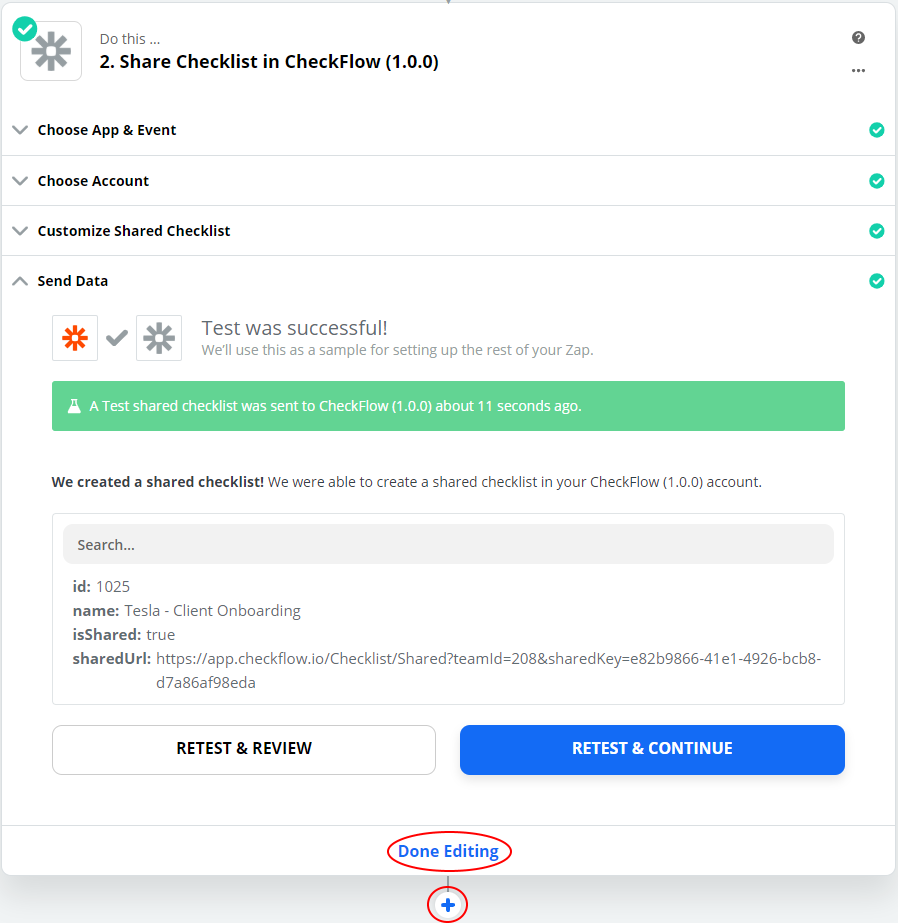
The next screen is where you test the Zap. Once tested you should receive a message back confirming that the test was successful.
We have now created a Zap. However, in this example we're creating a two-stepped Zap. So, instead of clicking the 'Done Editing' button, we're going to click the plus (+) icon right at the bottom to add a second 'Do this...' step.
A new 'Do this...' box will be added and you will be able to search for a new app to add.
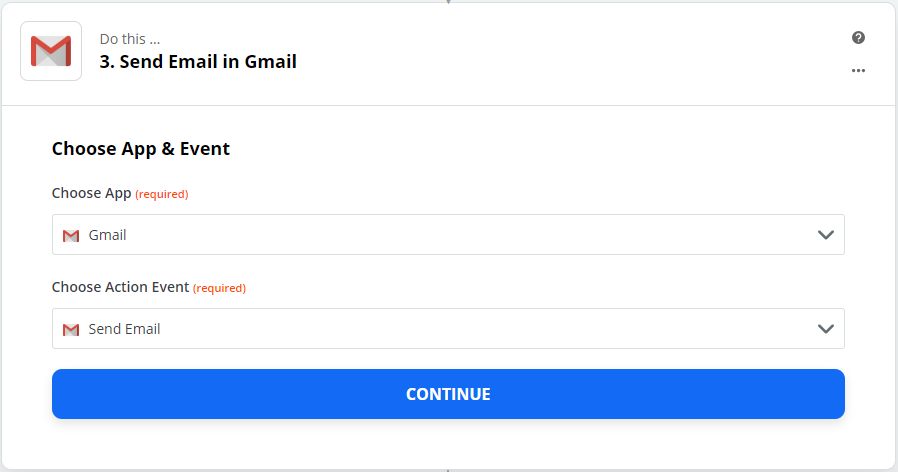
Search for and choose Gmail.
info
If you don't use Gmail you can use one of the other email apps - Zapier have their own email app that can be used by anyone
From the 'Choose Action Event' control, choose the 'Send Email' action.
You will be asked to sign in to Gmail.
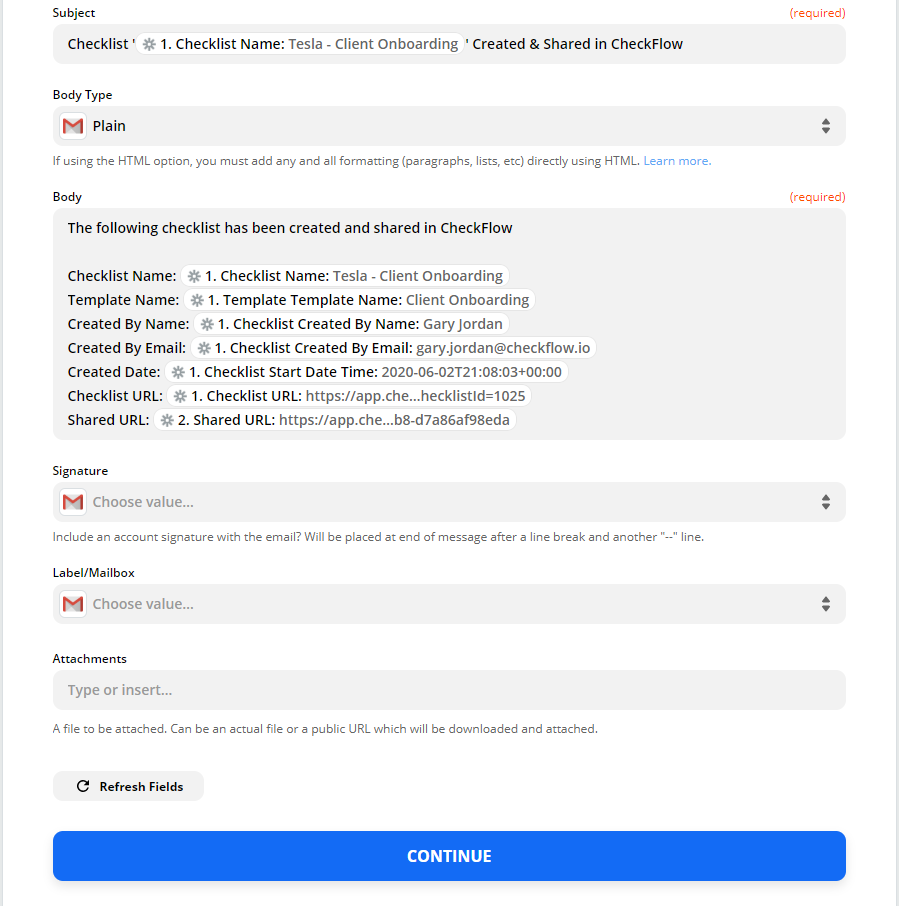
Once you have signed in you will be able to customize the email that will be sent.
There are a number of fields that can be completed (e.g. To, Cc, Subject, Body etc).
Each field has a description to help you. Click on the field control to enter static data, or pick from the data returned in either the initial 'New Checklist' trigger event, or the 'Share Checklist' action.
Here is how we have customized our email.
The next section will confirm the details of your Zap and ask if you would like to send a test email. It's best to send a test email if possible.
Here is the result of our test. As you can see, the data in the email subject and body is dynamic and specific to the checklist that was created and shared.

🎉 Your Zap is now complete.
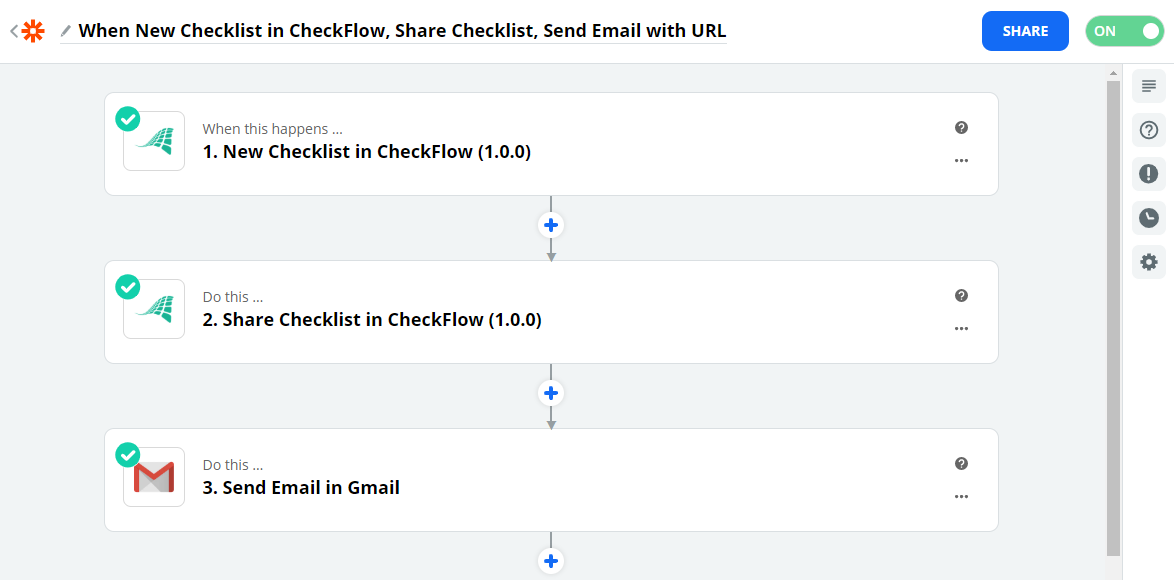
You should now see an overview of your Zap.
Be sure to name your Zap by clicking on the title at the top.
Turn your Zap on by clicking the toggle switch on the top right.
Zapier Common Use Cases
The CheckFlow Zapier integration provides you with an almost unlimited number of ways to automate your workflows. The possibilities can be overwhelming at first.
Here are some use case scenarios we think will be popular with our customers:
- Automatically send an email (via Gmail or one of the other email providers) when a task is completed.
- Update Salesforce with data collected in a checklist.
- Create a checklist when something is done in Salesforce.
- Fill out and send a contract via HelloSign using information collected in a checklist when a specific task is completed.
- Add files collected in a checklist to cloud storage (such as Dropbox or Google Drive).
- Create a checklist when a new row is inserted in a Google Sheets document.