Template Parameters
Parameters can be added to your templates and then bound to any number of controls or task assignments.
The values of your parameters are set when the checklist is run. Your parameter bindings are then dynamically updated.
This is a powerful feature that opens up a wide range of possibilities. Here are some common usage scenarios:
- Task Assignments - Your process has a number of tasks that need to be completed by a member of your sales team. The specific salesperson is not always the same. Assign these task assignments to a parameter and they can then be set to the correct salesperson when the checklist is created.
- Set Values at Run Time - Your process has a drop down field control called "Customer Plan". This drop down control uses Conditional Logic to show and hide certain tasks based off the selected value. You can create a parameter to set the selected value at run time so that your process is set up correctly straight away.
- Set Default Values - Your process has a number of controls that would benefit from default values. Set parameters for these and set the default parameter value accordingly. When the checklist is run the default parameter values will be passed to any bound controls. You can also override the default values if required.
- Populate List Controls Options at Run Time - Your process uses one or more of the list controls (Drop-Down, Multi-Choice or Sub-Tasks). The options you want to be displayed in these controls are not always the same. You can bind these controls to a parameter and set the value to any comma delimeted string to create the options at run time.
Parameter Types
You can create three different types of parameters.
String - This is the most common data type. It can be used in a few ways:
- To set some text in a control.
- To set a selected value in a Drop-Down control. Simply type the option you want to select.
- To set the selected values in a Multi-Choice control. Simply type the options you want to select in a comma delimeted string (e.g. Option 1, Option 4).
- To set sub tasks as complete in a Sub-Tasks control. Simply type the sub tasks you want to complete in a comma delimeted string (e.g. Task 1, Task 3).
- To populate the options in a Drop-Down or Multi-Choice control. Type the options you want to create in a comma delimited string wrapped with square brackets (e.g. [Option 1, Option 2, Option 3]).
- To populate the tasks in a Sub-Tasks control. Type the tasks you want to create in a comma delimited string wrapped with square brackets (e.g. [Task 1, Task 2, Task 3]).
Date & Time - This allows you to set the value of a Date & Time control.
Member or Group - This allows you to select one or more members and/or groups. This is used to set task assignments at run time.
Creating Parameters
Template parameters are created within your process template.
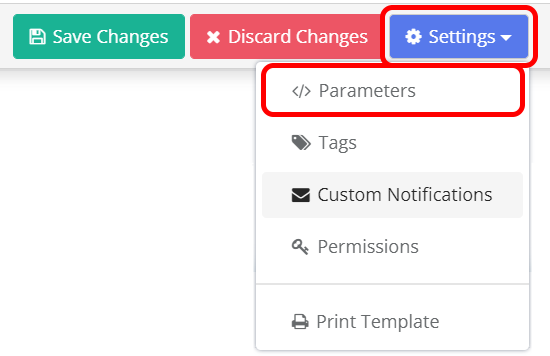
Open your template and click the Settings button. Then click the Parameters button from the sub-menu that appears.
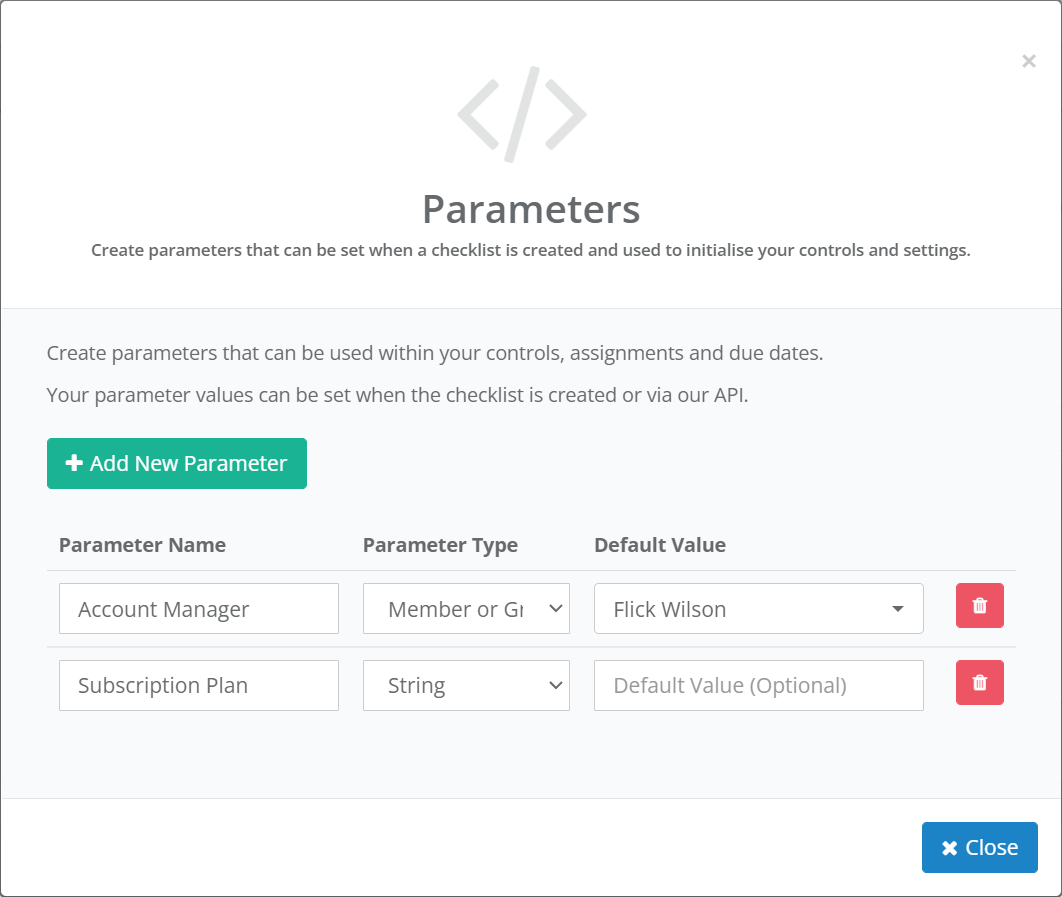
The Parameters popup form will be displayed.
Click the Add New Parameter button. The new parameter will be added to the parameters table.
Configure your parameter using the three controls, as follows:
- Parameter Name - This is used to identity the parameter when prompted, or during binding.
- Parameter Type - This is the parameter data type (either String, Date & Time or Member or Group).
- Default Value - You may specify a default value for your parameter. This is optional.
In the example below you can see that two parameters have been created.
Binding Parameters to Task Assignments
You can bind any parameter that is of type Member or Group to one or more task assignments
Select the task you want to bind your parameter to and click the Assign button.
The Assign Task popup form will be displayed.
The system will detect that one or more compatible parameters exist and a control labelled Parameter Binding will be displayed. Use this control to select the parameter you want to bind the task assignment to.
Click the Save Changes button to save and close the form.
Binding Parameters to Controls
You can bind parameters of type String or Date & Time to the following controls.
- String
- Drop Down
- Email Input
- Embed
- Long Text
- Multi Choice
- Short Text
- Video (URL of the Video to embed)
- Website
- Date & Time
- Date Picker (All modes - Date Only, Time Only, Date & Time).
To create a binding, firstly locate the control you want to bind the parameter to. Each control is displayed in a floating box in the Task Content area. There are buttons at the top of the box, which allow you to perform various functions.
Click the Content Settings button with the control box and then click the Parameter Binding button from the sub-menu that appears.
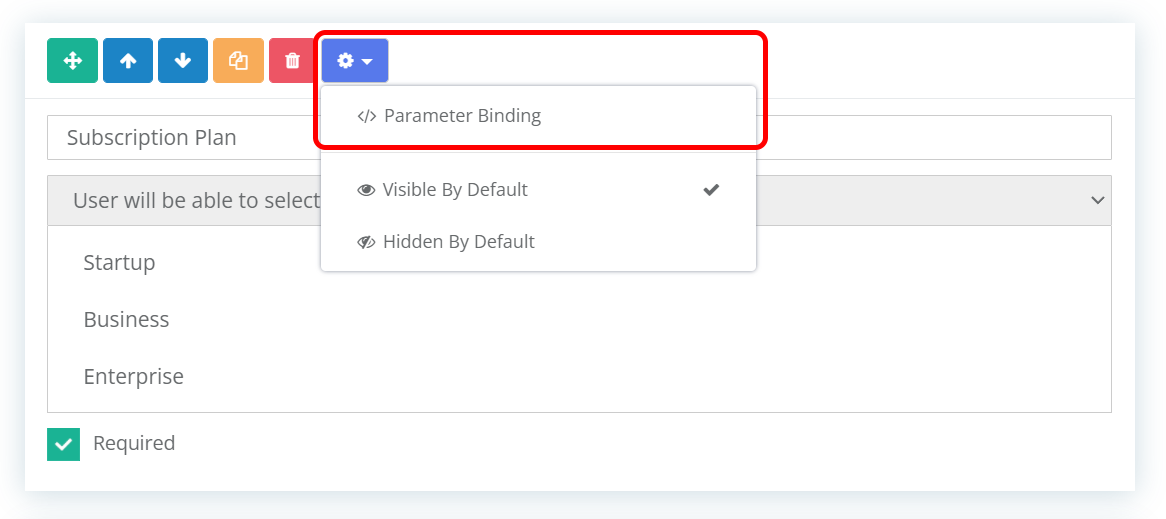
The Parameter Binding popup form will be displayed.
This form will provide some information on how the parameter value can be used for the particular control type you are binding to. For example, in the screenshot below you can see that there are instructions on how to use parameters with the Drop Down control.
Below the instructions is a select control labelled Parameter. Use this to select the parameter you wan't to bind this control to. If a parameter is not compatible with this type of control it will be crossed out and show an Incompatible warning. You can see an example of this in the screenshot below.

Once you have set the binding click the Close button. You can assign a single parameter to multiple controls.
Setting Parameters at Checklist Run Time
All parameters you create will be included in the Create & Run New Checklist prompt. This is the popup you see when you create a new checklist.
In our examples above, we created two parameters:
- Account Manager - This was a Member or Group parameter. We bound this to the task assignments.
- Subscription Plan - This was a String parameter. We bound this to the Subscription Plan control.
When we create a checklist based off this template the two parameters we created above are included in the prompt. The screenshot below shows this.
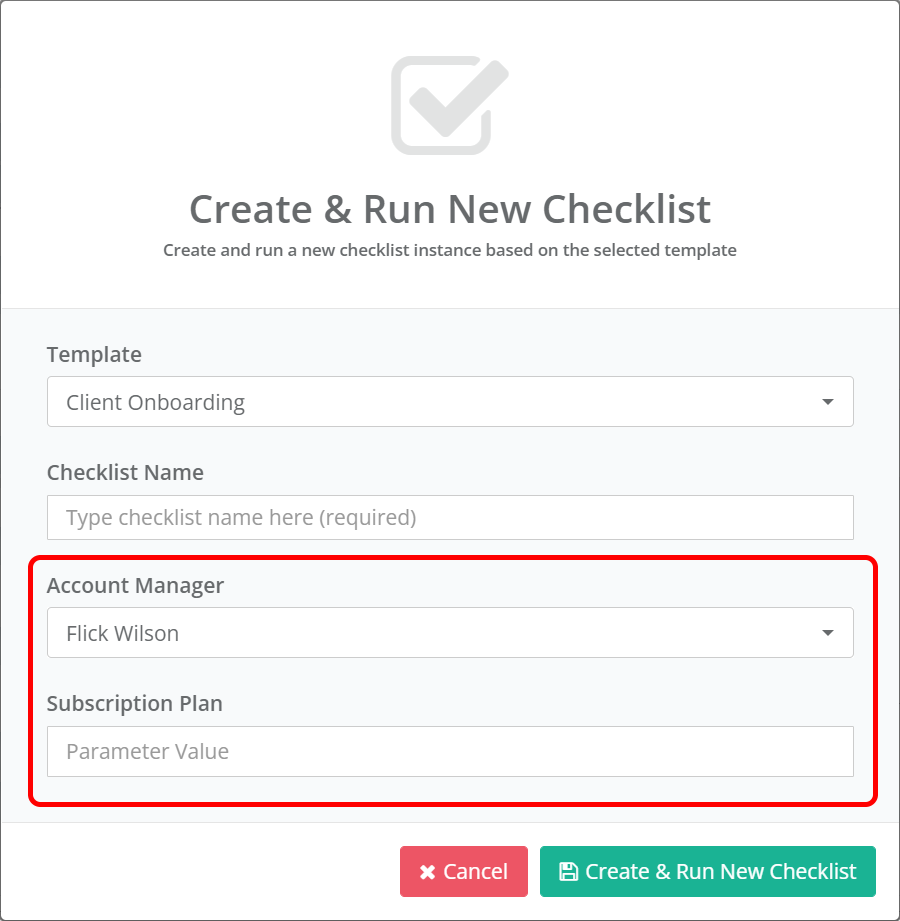
The Account Manager parameter is pre-selected with the Default Value we set in our parameter.
Parameters are not required fields. They can be left empty. If you leave the value empty the binding will just remain unaffected.