Custom Notifications
Custom notifications allow you to automatically send emails to users, groups or external email addresses when specific events occur within your checklists.
Improve the efficiency of time sensitive processes by sending emails at any period before or after a task is due.
Keep in the loop by sending emails when a task changes status, or even when an entire checklist is completed.
There are no limits to the number of custom notifications you can create. It is easy to build a series of fully automated and dynamic notifications to meet your exact requirements.
Example Use Cases
- Your 'Client Onboarding' process has a number of tasks that have Dynamic Due Dates. You would like to send a reminder email when these tasks are due in 1 day (When Task Is Due In).
- Your 'Customer Enquiry' process has a task that must not be completed any later than 12 hours after the due date. You would like to send an email when this task is overdue by 4 hours, and again at 8 hours. If the task is still overdue at 12 hours you would like to send an email to management (When Task Is Overdue By).
- When your 'Employee Onboarding' process is completed you would like to send an email to notify all team members in the 'Human Resources' group (When Checklist Is Completed).
- Your 'New Product' process has a specific task that is particularly important. You want to know when this task has been completed so that you can immediately review it (When Task Is Completed).
Anchors, Triggers & Actions
Custom notifications are created using an anchor, trigger and action.
- Anchor - This can be the entire checklist and/or any tasks within the checklist. Multiple tasks can be selected.
- Trigger - This is the event that triggers the custom notification.
- Status Is Changed - When the status of the checklist or task changes (to Completed, Uncompleted or Not Applicable).
- Is Completed - When the status of the checklist or task changes to Completed.
- Is Uncompleted - When the status of the checklist or task changes to Uncompleted.
- Is Not Applicable - When the status of the task is changed to Not Applicable.
- Is Overdue By - When a task is overdue by a given period.
- Overdue By X Months, X Days, X Hours, X Minutes.
- Is Due In - When a task is due in a given period.
- Due In X Months, X Days, X Hours, X Minutes.
- Action - This is the action that will be taken when the custom notification is triggered.
- Notify - Pick one or more Users and/or Groups in your team to send the email notification to.
- Or Email - Enter any email address to send the notification to.
- Separate multiple email addresses with a semicolon.
Creating a Custom Notification
The recommended way to create custom notifications is from within your process template. This is because custom notifications created in your template are inherited by all derived checklists. This fully automates the creation of your custom notifications within your checklists.
Custom notifications can also be created or modified in your checklists but they affect that checklist only.
The rest of this section will describe how to create a custom notification from within a template.
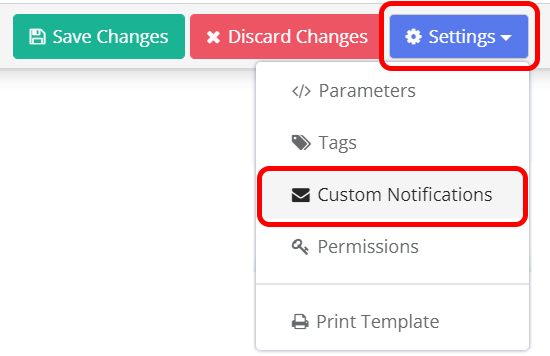
Open your template and click the Settings button. Then click the Custom Notifications button from the sub-menu that appears.
The Custom Notifications popup form will be displayed.
Click the Add New Custom Notification button to add a new custom notification. You can add as many custom notifications as you need.
Each custom notification is shown in it's own box. You can set all of the required properties in this box.
Starting from the top left:
- Select one or more anchors. The entire checklist and all tasks can be used as an anchor.
- Select the event that will trigger the custom notification.
- If you select a trigger of either Is Overdue By or Is Due In four more text boxes will be displayed for you to specify the period in Months, Days, Hours and Minutes.
- Select one or more Users and/or Groups in your team to send the email notification to.
- Enter any email address to send the notification to (separate multiple email addresses with a semicolon).
Example
The example below shows how these two custom notifications are created.
- When the 'Company Details' and 'Primary Contact Details' tasks are due in 6 hours send a notification email to the user 'Demo User 3' and all users in the 'Human Resources' group.
- When the 'Confirm Details' task is completed send a notification email to the user 'Flick Wilson' and also to the email address 'admin@checkflow.io'.
Modifying or Deleting a Custom Notification
You can modify or delete an existing Custom Notification in a similar way.
Open your template and click the Settings button. Then click the Custom Notifications button from the sub-menu that appears.
The popup form will be displayed. From here, you can delete or make changes to an existing Custom Notification.
Once you are finished, click the Close button.
Custom Notifications Within Your Checklists
Custom Notifications are usually defined in your template. They are then automatically applied to all checklists that are derived from your template.
However, you can create or modify custom notifications in your checklists too.
To do this, open your checklist and click the Show Menu button to expand the checklist menu. From the menu, click on the Cusom Notifications button.
The Custom Notifications popup will be displayed. You can use this to create, modify or delete custom notifications in the same way as above.