Enable Okta SSO
There are four steps to set-up the Okta SSO connection:
- Set-up Okta application.
- Provide metadata to CheckFlow.
- Assign the application to People or Groups.
- Verify Okta SSO is working with CheckFlow.
Contact Us
Please contact us prior to starting Step 1.
We will need to manually generate your Subdomain and Audience URI.
Step 1: Set-up Okta application
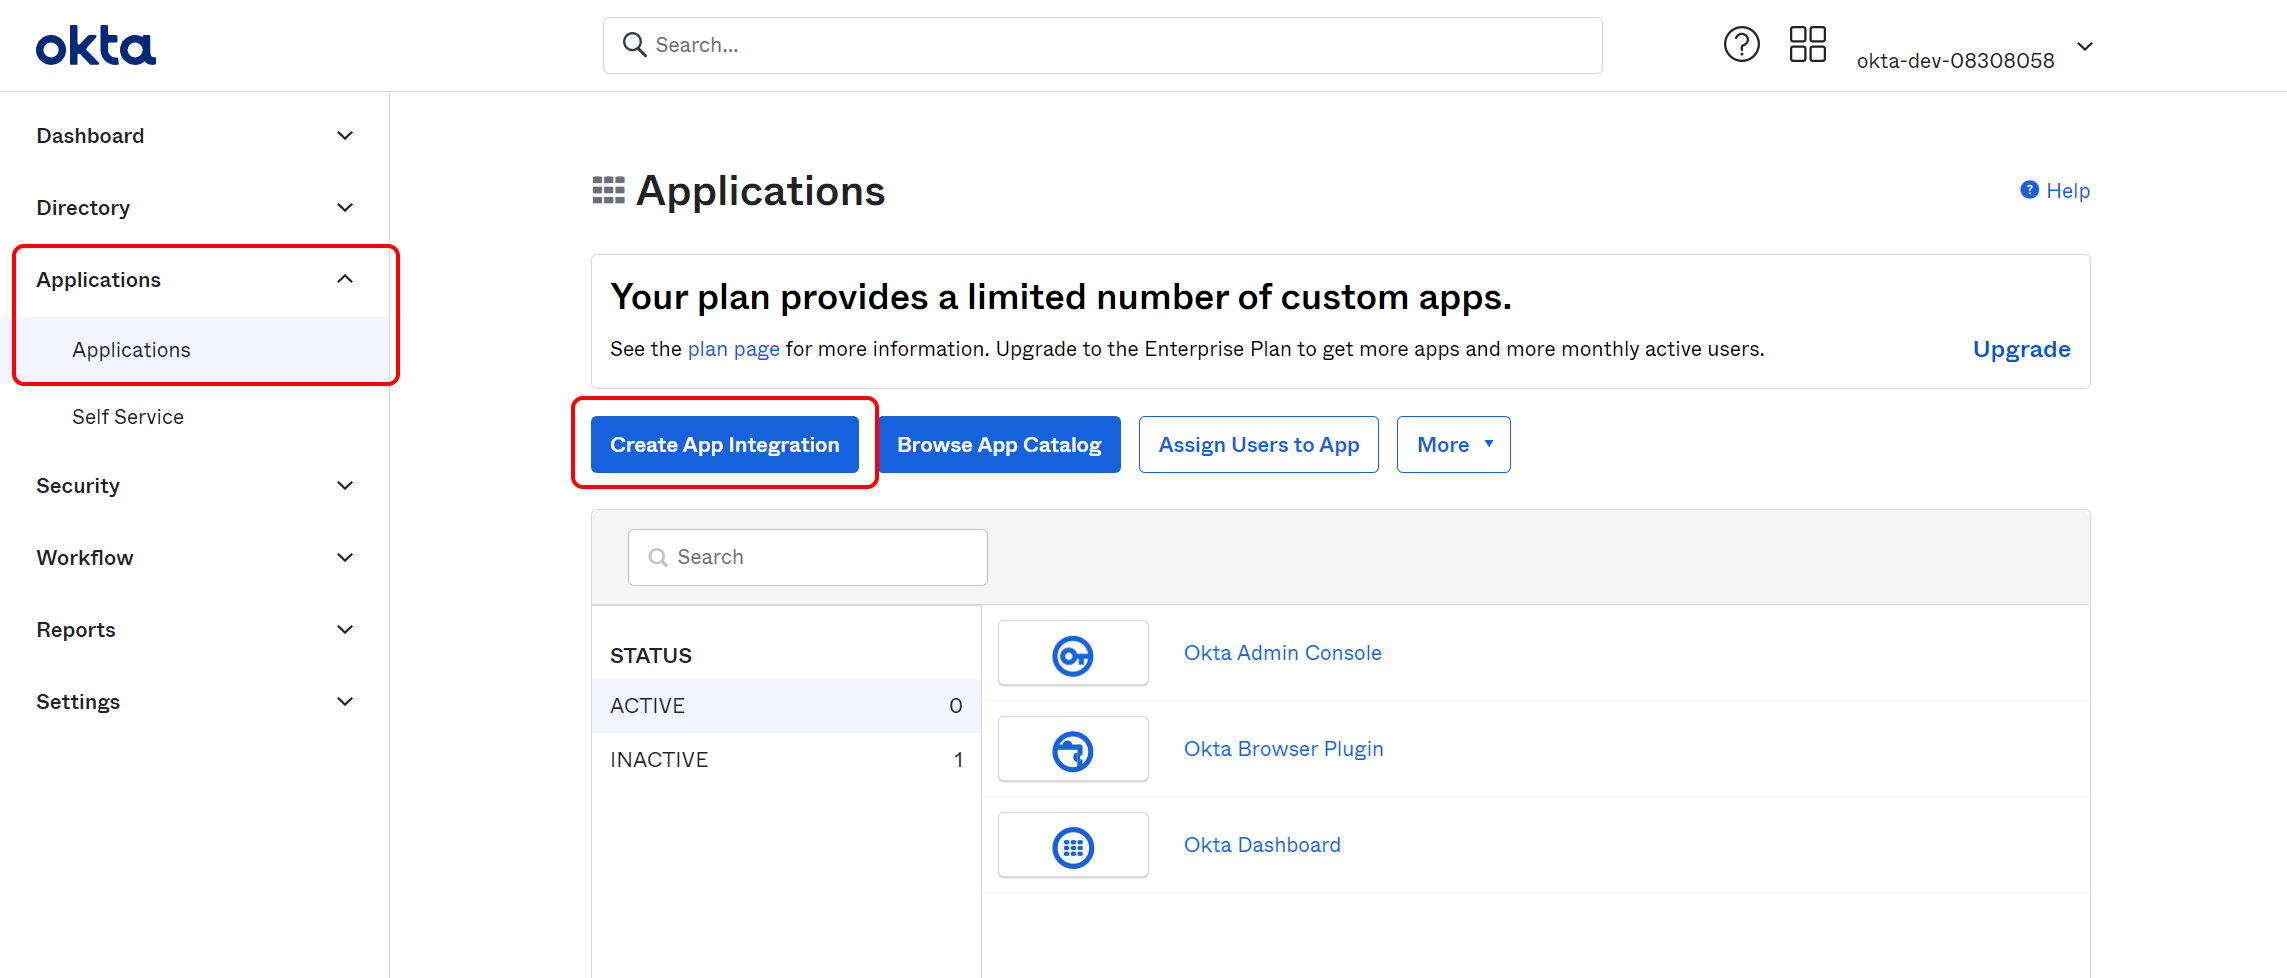
- Login to your Okta dashboard and click on the Applications menu item on the left. Then click on the Create App Integration button.
On the Create a new app integration pop-up window, select SAML 2.0 as the Sign on method. Then click on the Next button.
You will now create your SAML integration. On the General Settings page, enter the following information:
- App name: CheckFlow
- App logo (optional): Our Okta logo is: https://docs.checkflow.io/img/checkflow-okta-logo-420x120.png
- App visibility: Select whether you want your users to see your application icon.
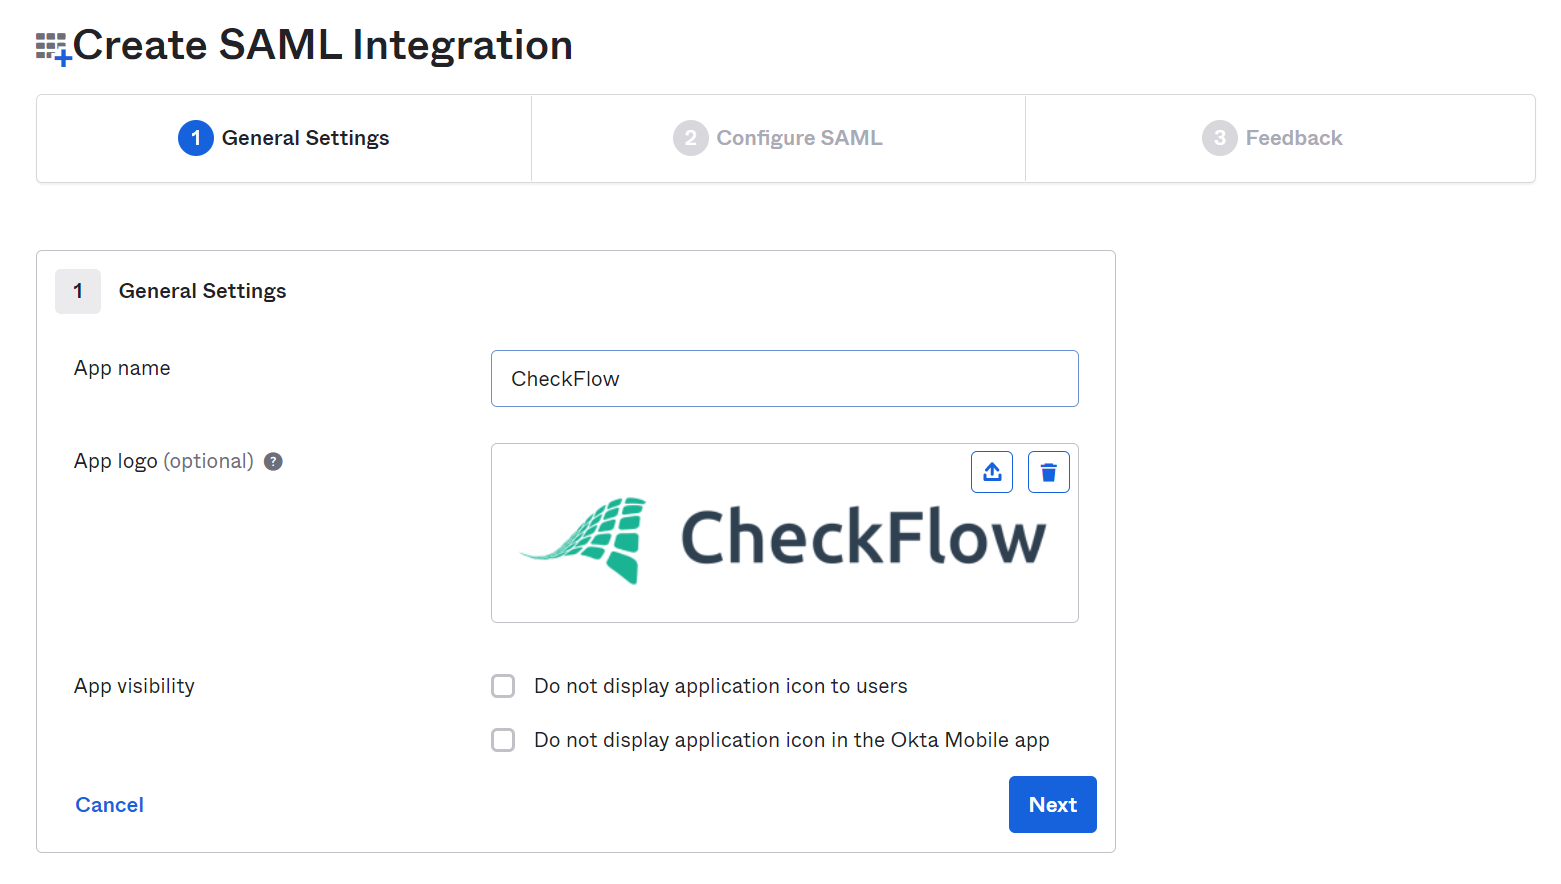
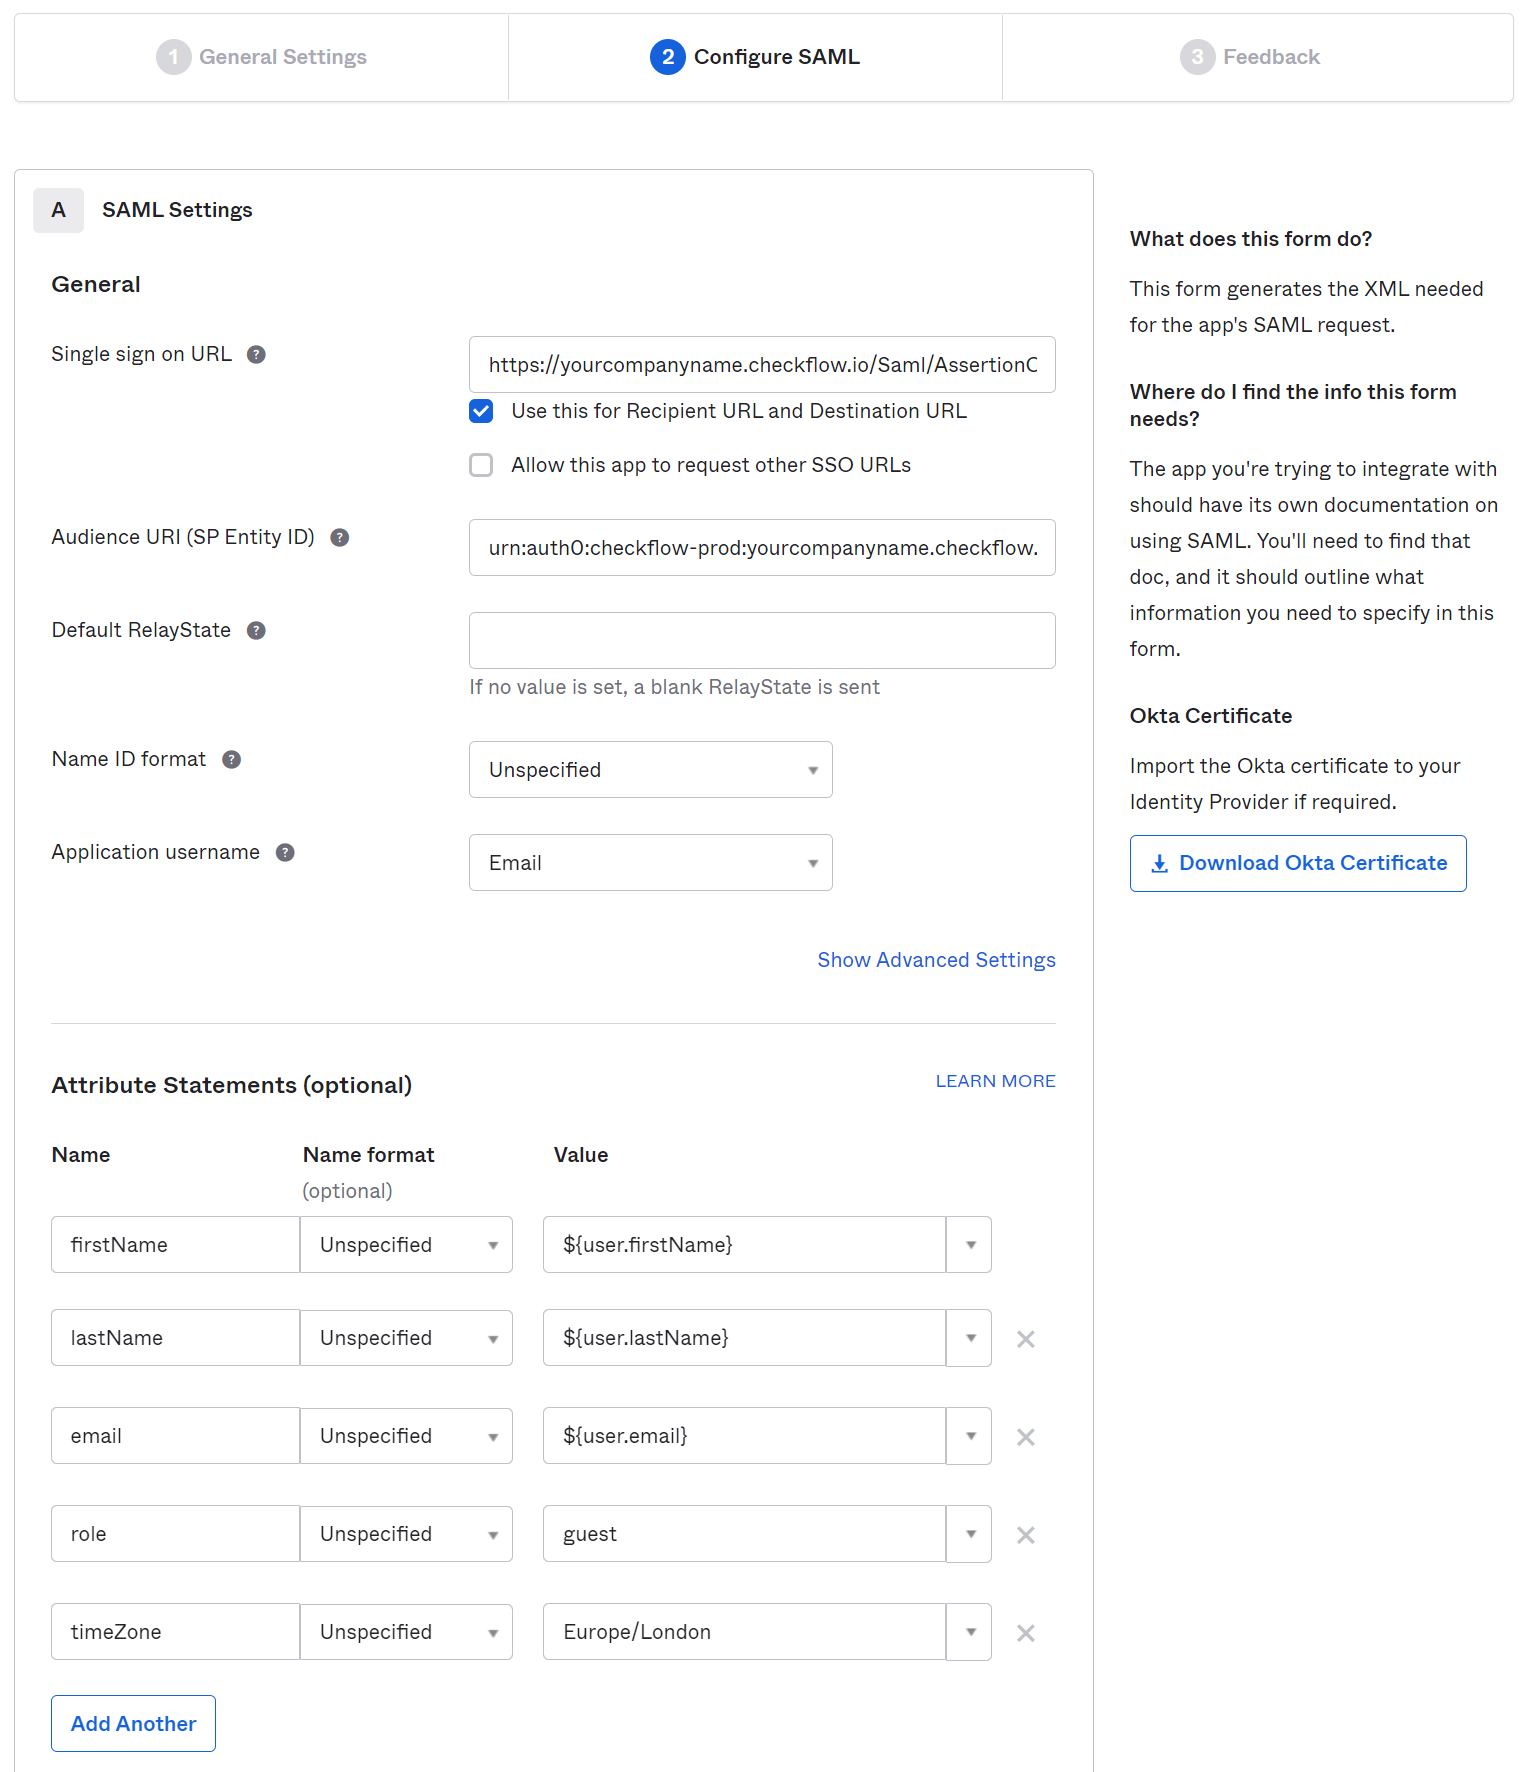
- Click on the Next button to proceed to the Configure SAML page. Enter the following information in the General section:
- Single sign on URL: Provided by CheckFlow
- Example: https://yourcompanyname.checkflow.io/Saml/AssertionConsumerService
- Use this for Recipient URL and Destination URL - Checked ✔️
- Allow this app to request other SSO URLs - Unchecked ❌
- Audience URI (SP Entity ID): Provided by CheckFlow
- Example: urn:auth0:checkflow-prod:yourcompanyname.checkflow.io
- Default RelayState: Leave blank
- Name ID format: Unspecified
- Application username: Email
- In the Attribute Statements section create the following attributes:
- email - ${user.email}
- firstName - ${user.firstName}
- lastName - ${user.lastName}
- role (optional) - This can be: 'administrator', 'member' or 'guest'. Defaults to 'member' if this attribute is not created.
- timeZone (optional) - This can be any IANA Time Zone (TZDB) ID. For example: 'Europe/London', 'America/New_York'. Defaults to 'UTC' if this attribute is not created.
Optional Attributes
The role and timeZone attributes are optional. These properties can easily be changed within the 'Team Management' and 'User Settings' pages in CheckFlow at any time.
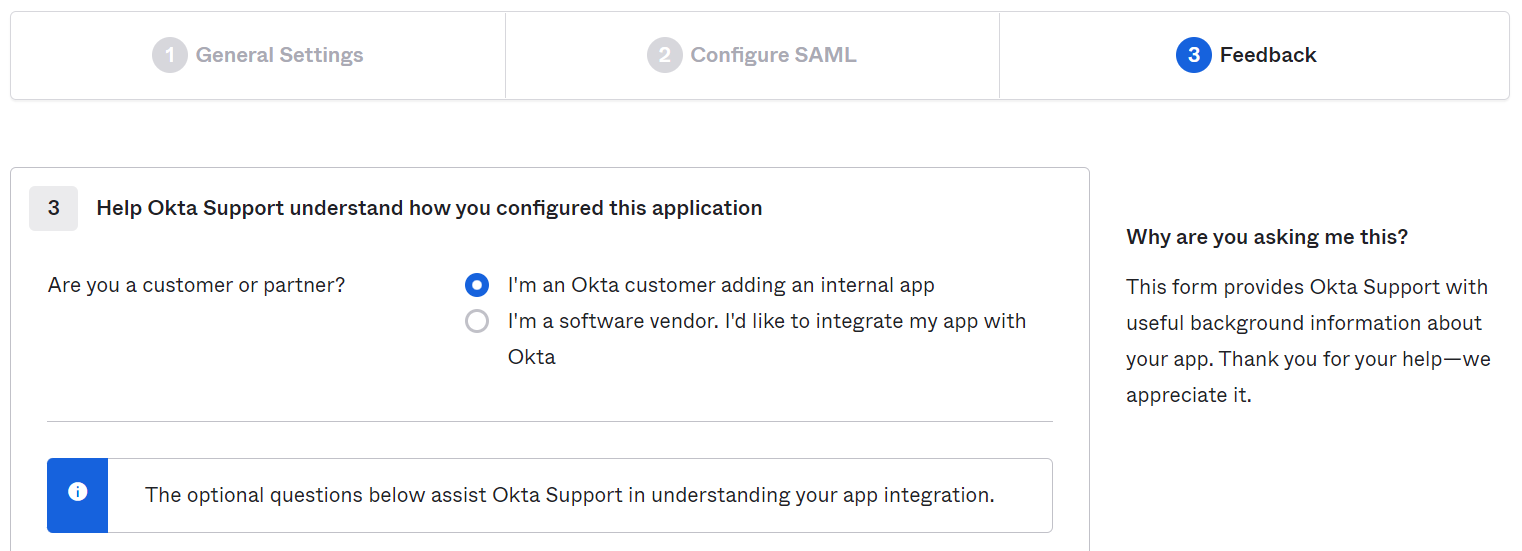
- Click on the Next button to proceed to the Feedback page. This page is mostly optional. Answer the first question 'Are you a customer or partner?' by selecting 'I’m an Okta customer adding an internal app'. Then click on the Finish button.
- You will be directed to the Sign On page for your newly-created app. Please stay on this page within Okta and proceed to the section below for instructions on how to retreive your metadata.
Step 2: Provide metadata to CheckFlow
The identity provider metadata allows for dynamic configuration. This simplifies the SAML setup process.
- Go to your CheckFlow application page in your Okta admin dashboard.
- Click on the Sign On tab. Then click the hyperlink under View Setup Instructions that says Identity Provider metadata. This will open a new tab to your metadata.
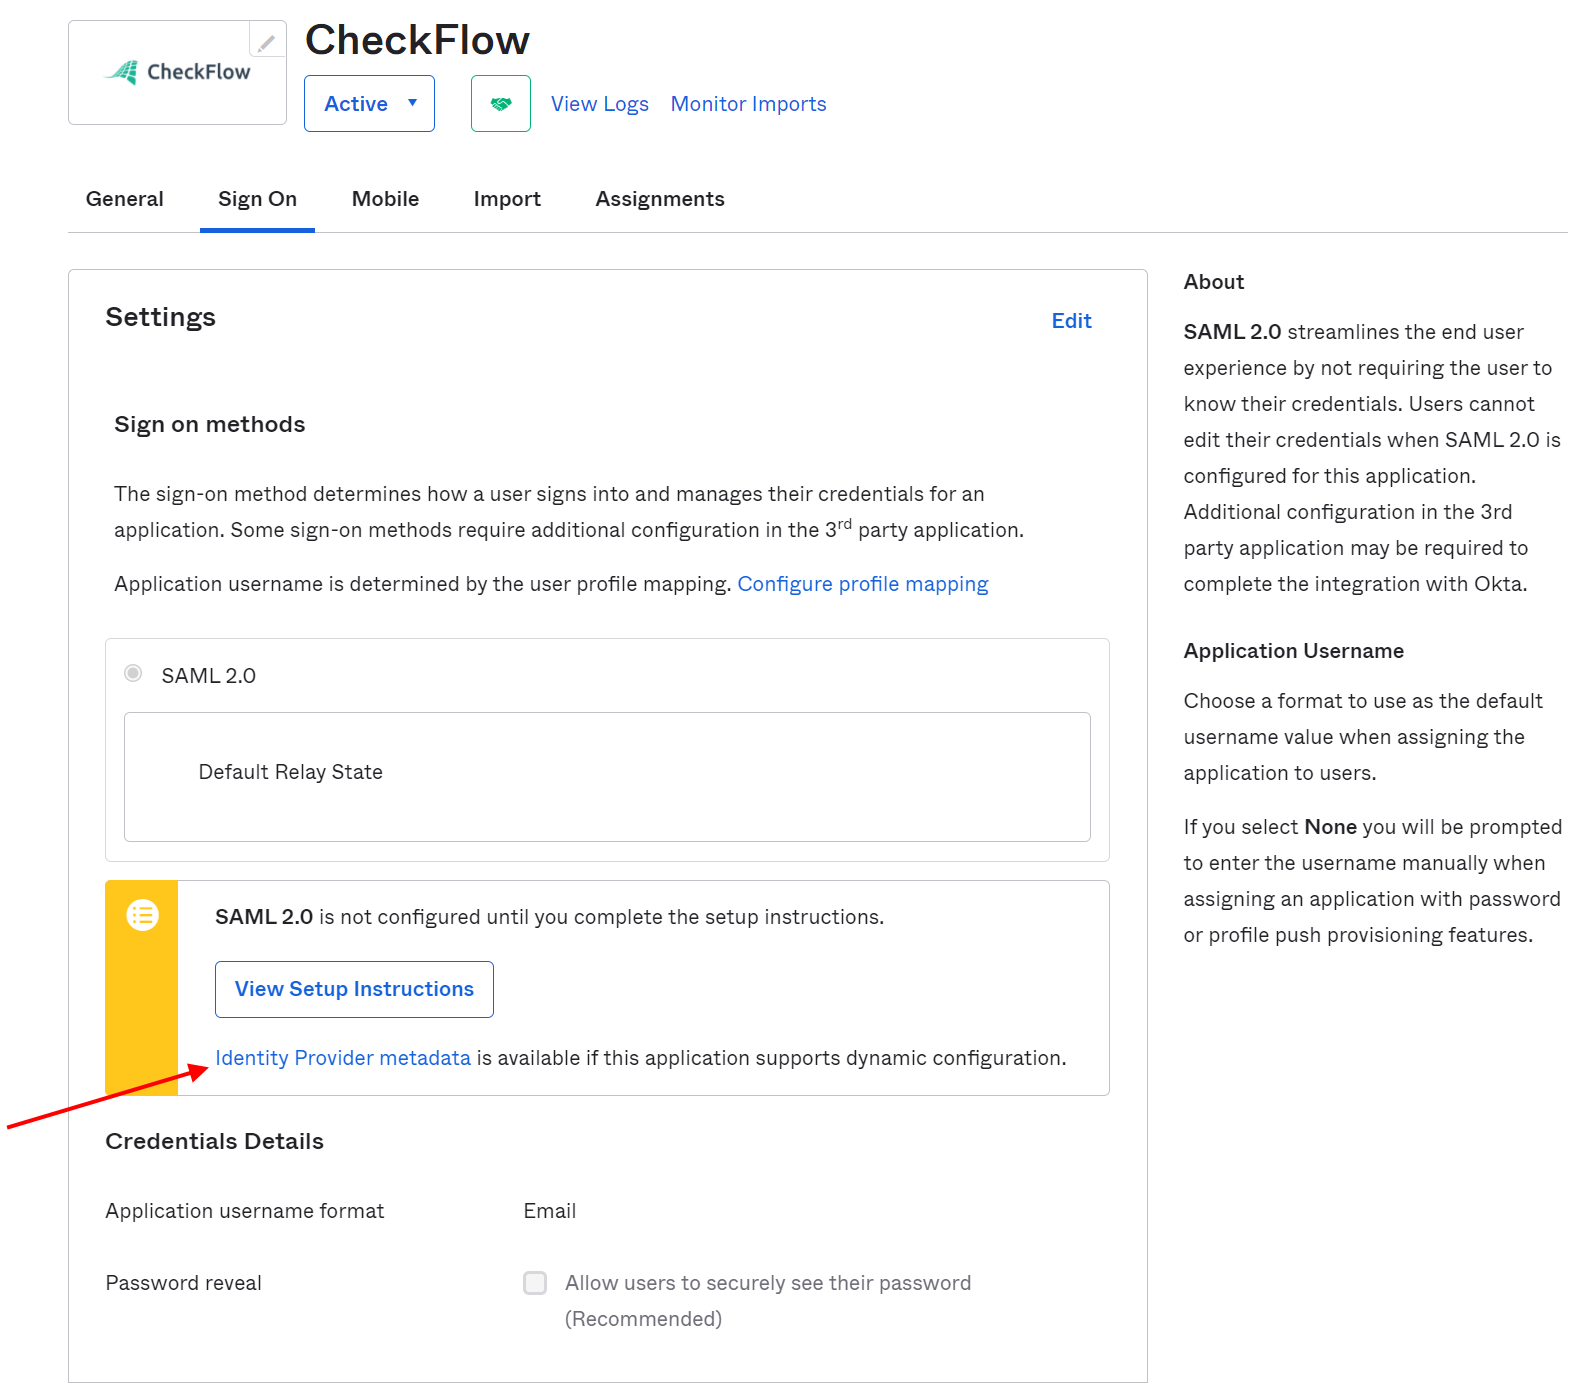
- Copy the metadata URL and provide this to us. We will then add this to your account.
Step 3: Assign the application to People or Groups
- You can now assign the application to people or groups. Click on the Assignments tab and then click on the Assign button.
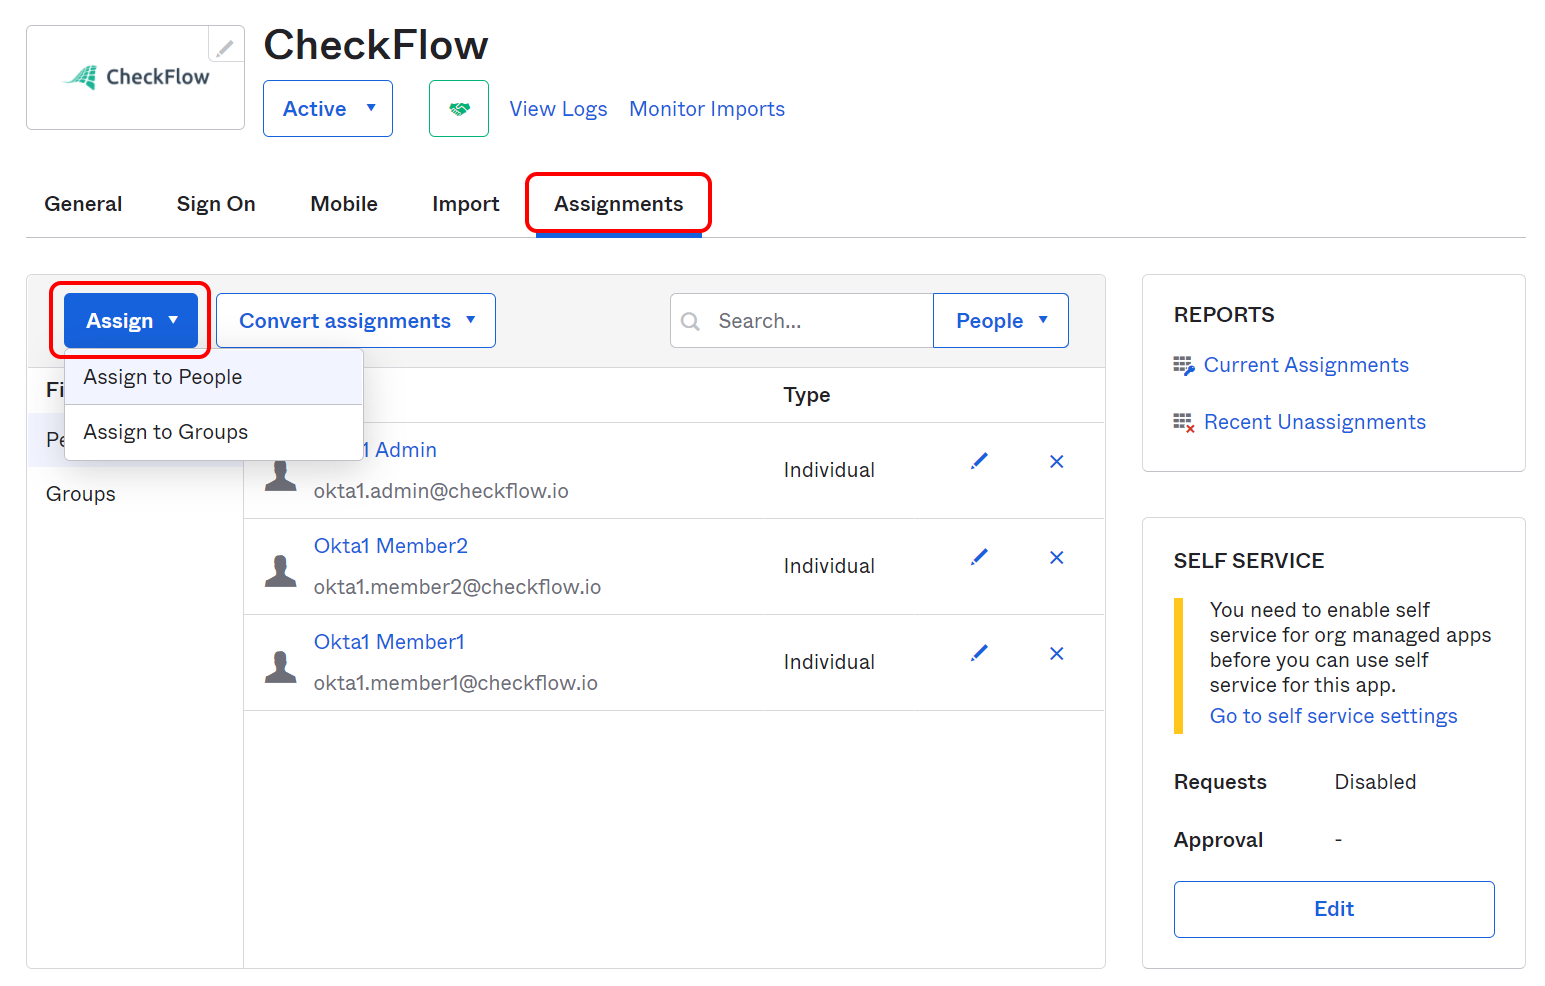
- You can also perform a bulk assignment by clicking on the Applications menu item on the left. Then click on the Assign Users to App button.
Step 4: Verify Okta SSO is working with CheckFlow
All users that have been assigned to your newly created Okta application should now be able to access CheckFlow using Okta SSO.
New user accounts are created the first time a user logs in to CheckFlow.
Simply open a new tab in your browser and access CheckFlow using your custom URL.
For example: https://yourcompanyname.checkflow.io/